Favorite Books 2022

Mixing things up a little bit today with a (hopefully) fun post. A leisure activity that I really enjoy is reading. I have pretty eclectic tastes and I enjoy discovering new books to read. So I am sharing some favorites from the past year that might help someone else discover a new title! And because this is mainly a design and sewing blog, I decided to pair each book with a pattern design of mine that I think matches the book in some way. I am choosing to share my Top 3 favorite books I read this year (along with 2 honorable mentions) Why Top 3? I completed 27 books this year (number 28 will overlap into 2023) which is a decent number especially considering that a few were thick tomes (Including The Portrait of a Lady by Henry James which does NOT get a top spot). But as I reviewed the list a lot of them were just mediocre and I only wanted to share the best of the best. I hoping to have a better mix in 2023! I am also sharing 2 honorable mentions to help round out the list. So here they are in no particular order and spoiler FREE!

THE TOP 3

MIDDLEMARCH by George Elliot

I actually started this book in December 2021 but didn’t finish it until well into 2022 so I am counting it for this year’s list. This book is definitely a long and slow read, but it also took me a bit to finish because I chose to take breaks along the way and read a few other faster books. The novel is broken up into “books” which are not not stand alone stories but do provide good points to take a break if you need one. Obviously this book made my Top 3 so I think it is WORTH the time investment!

I had it in my mind to read something by George Elliot. After looking through the options, Middlemarch stood out as her “best”. I definitely think it deserves the “masterpiece” designation. This sweeping novel has a huge cast of characters and, if you can look beyond the sometimes heavy prose, the story is really good! This book is definitely hard to read. I read ebooks and sometimes I would have to look up several words PER PAGE! (Love that I can do that). And there is a lot of superfluous rambling that I think could have been streamlined. But I do think it is worth the effort!

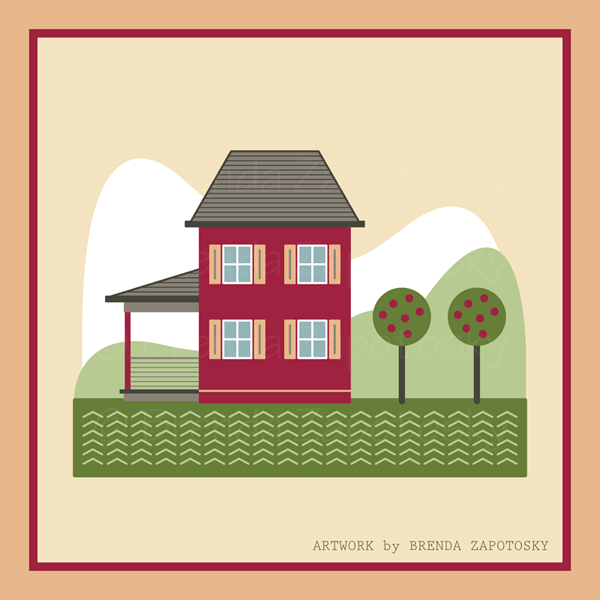
THE DESIGN: Little Cabins (Summer)

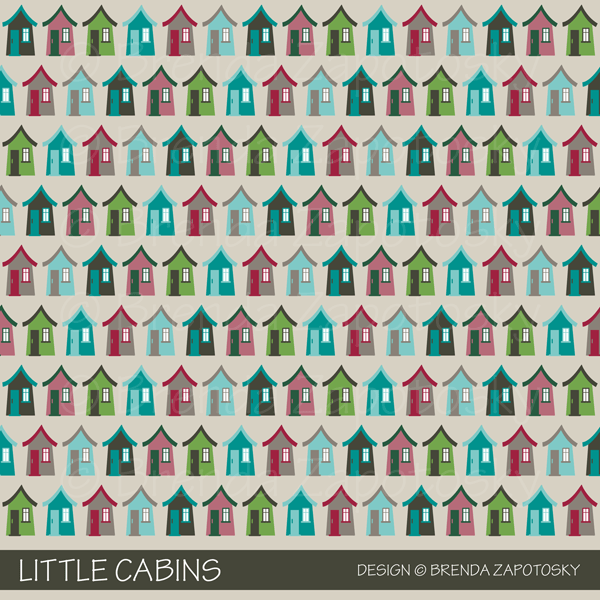
It is hard with a long book that covers so much to sum it up with a single design. I decided to go with my Little Cabins design in honor of my favorite character, Dorothea Brooke, who loved to draw “cottages” for the people who lived on the estate lands. These are pretty basic little dwellings in my design. Dorothea’s heart was so generous I am sure her designs were much more complex than these simple structures.

JAMAICA INN by Daphne Du Maurier

In total I have read 3 books by Du Maurier (not all this year), plus some but not all of the short story The Birds). 2 have been fantastic, 1 kind of disappointing. This year’s selection was Jamaica Inn and it definitely falls in the fantastic column! As I don’t want to give too much away I am not going to dive much into this one beyond saying that even I, who am very hard to surprise, did not expect all the twists! (Even though I did guess one of the big ones early on). I will say that if you want to go into this one completely blind DO NOT read the book blurb provided most places! It gives away a big plot point.

THE DESIGN: Landscape (Siesta)

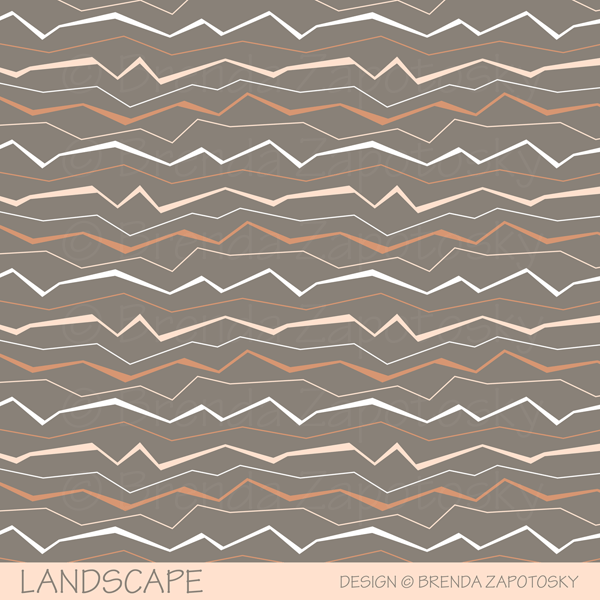
I chose my Landscape design in the Siesta colorway for this book since so much of the novel takes place on the moors of England it is almost a character of its own! This design was created for my Canyon Collection which is dessert themed, but I think the abstract jagged lines fit the feel of the moors as well! And this colorway with taupe as the predominant color feels a bit more muted and misty.

A GENTLEMAN IN MOSCOW by Amor Towles

If I had to pick just one favorite book this would be it based on its perfect combination of wonderful story and readability. I love that this book feels like classic fiction without all the weighty prose of something like Middlemarch. This book tells the story of a (former) Count Rostov who is sentenced to live the rest of his days as a “prisoner” at the Metropol Hotel. If you like books with lots of action this is not the book for you. I would estimate that probably the first 25% of the book is merely setting up the life and “landscape” of Count Rostov. A fast paced plot is not what this book needs. That is not the reality of the main character’s fate. What this book does, and does well, is give you a look into the life of a truly likable character and by proximity a very colorful supporting cast. The book jumps along in time so you get a lot of (light) history on the way. And there is some excitement too! I loved this book so much, after I finished it I could have flipped to page one and started rereading it immediately! I am not sure I have ever felt that way about a book before.

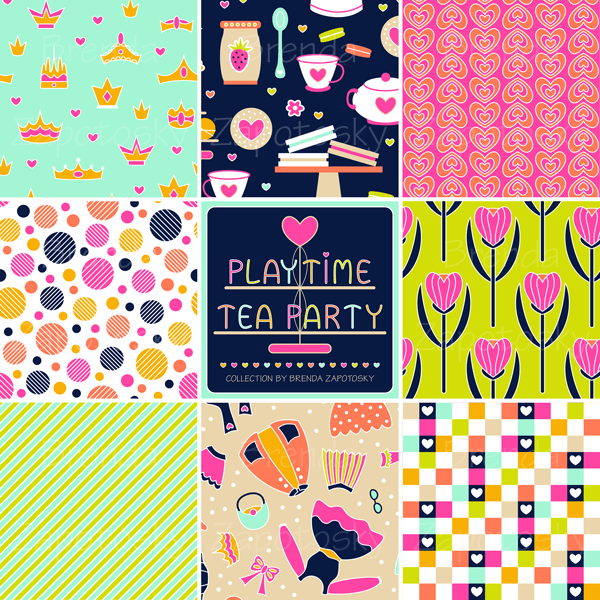
THE DESIGN: Playtime Tea Party (Dreamy)

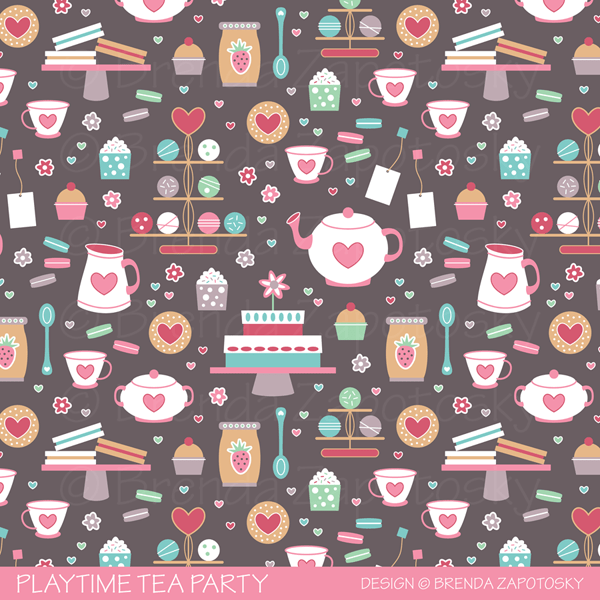
It was difficult to decide on a pattern for this book, especially when restricted to my current library of designs. Since food plays an important role throughout the book I chose a food themed design. And I picked Playtime Tea Party because it is “fancy food” in a sense and that DEFINITELY would appeal to the Count. Also, there is an almost tea party in the book. (No spoilers beyond that). Plus I like the playtime theme because the Count, while a charming, refined aristocrat, also reveals a playful side on more than one occasion!

HONORABLE MENTIONS

I decided to add a few other books to the list to round out the selections a bit. I enjoyed both of these. I wouldn’t rank them in the top favorites, but I would recommend them. And I chose them because they offer a different type of read for those who might not be interested in any of the books above!

THE MAGICIAN’S NEPHEW by C.S. Lewis

This was a reread for me as I have both read the book and listened to the audio book before (I am never sure if I should call that reading). The Magician’s Nephew is the (now) first book in The Chronicles of Narnia series. (I say now because I had a boxed set as a kid where this book was the last one. I think it was because that was the order in which they were written. But in terms of storytelling this tale is first chronologically.) I recommended the series to a family member and it motivated me to return to it myself. I only ended up reading this one book. It was fun to see what I remembered and what I didn’t. And of course it is great no matter how many times you read it! And for those of you unfamiliar with the series they are “kids” books. Younger than YA but I don’t know the technical term. I think at the library they are labelled J. So it is a fast and easy read!

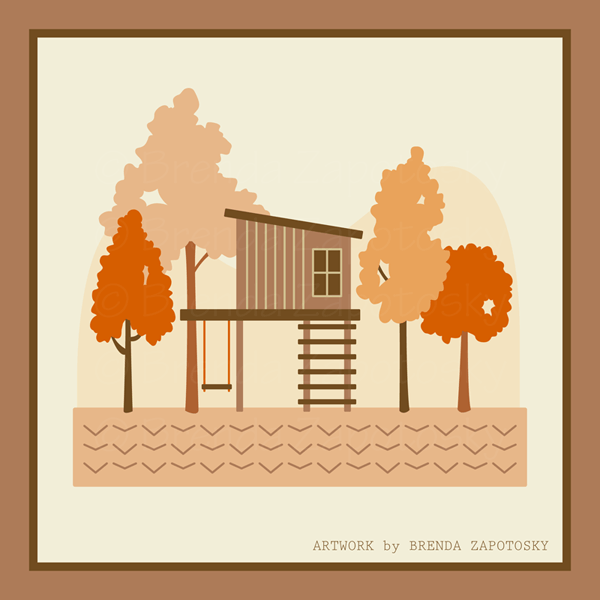
THE DESIGN: Heart Trees (Sugar)

If I were to create a design from scratch inspired by this book I would come up with something very different. But when choosing from my existing library of designs I decided upon Heart Trees because a tree does play an important in the story and these heart shaped trees fit the fantasy theme of the novel!

HER ONE MISTAKE by Heidi Perks

This book was pretty good. Not a top favorite but I wanted to include it because it is from a popular genre: the modern thriller/celebrity book club pick/beach read type novel. I am not knocking this genre AT ALL! I love a good intense thriller that draws you in. A fast, fun read is a great type for the book rotation. And maybe I am just ultra picky. But so often I see a person share a book photo on social media and rave about it and I decide to pick it up and end up not liking it at all! One reason may be that I like PG-PG-13 books and too many of these would get a R rating if made into a movie. (Seriously why can’t book have ratings! I would love that!) But also maybe I just have weird tastes? So since I FINALLY read one of “these type” books that I enjoyed without any major objectionable content (that I can recall) so I thought it deserved a spot on the list!

THE DESIGN: Knock Down (Circus)

Not wanting even the design I pick to be any type of spoiler I chose my Knock Down design since the first main event of the book occurs at a school fair (which is mentioned right at the beginning of the book description).

THE END

I thought THE END was fitting way to wrap up this book themed post! I hope you enjoyed it and maybe found a new book to read. And if you DO read (or have already read) one of my suggestions I would love for you to leave a comment and let me know what you thought!

Until next time…

Thanks for reading,

Brenda

New Collection, New Collaboration

Happy February! Spring is around the corner and spring is in the air with a new collection that I am excited to share with you today that is actually a collection WITHIN a collection! Intrigued? Read on to learn all about this new collaboration!

Many months ago a group of us Spoonflower designers joined together to create a color cohesive collection for a Spring release. This is not the first time this group of designers has a created a group collection in this way but it IS my first time joining in the fun! We began by choosing a colorway. Designers were allowed to submit color palettes that we as a group then voted on. The winning colorway is very bright and bold (and a little out of my usual comfort zone to be honest). I do think it is quite lovely for spring!

Once we finalized the colors we moved on to the design phase! While technically this is our Spring Release Collection we did not have to create solely spring themed designs. Since these colors were so bold and playful (and slightly girly) I drew inspiration from my 6 year old niece and designs I thought she would love.. Some brand new and some a new color version of older designs (from several different collections). My collection is called PLAYTIME TEA PARTY!

Playtime Tea Party features whimsical prints inspired by imaginary tea parties and dress up fun! All my designs can be found together in one COLLECTION in my shop. I already have a second colorway in the works and an additional design which will be added to it over time. The designs can also be found in various collections elsewhere on Spoonflower where they are grouped with all the other designer’s patterns.

To keep the group collection to a manageable size and aide shoppers in finding great prints and coordinates there are actually 6 separate collections featuring our spring colors. The main collection features a wide range of design styles, basically we could submit up to 5 designs of anything we liked as long as they met the color guidelines. Here are the 5 designs of mine that you can find it the MAIN COLLECTION:

In addition to the main collection there are 5 sub-collections featuring popular coordinate categories: Basics, Blenders, Florals, Plaid, Checks

I have 3 designs in two of those categories. Two in BASICS

And then one in CHECKS

While not all styles will compliment each other, by designing in a color cohesive collection like this the number of options buyers have to mix and match greatly increases! I did not add any designs to the other collections (some of my designs could fit but I chose to put them in the main collection) but they are definitely worth checking out as they are filled with lovely designs! Here are the links:

BLENDERS

PLAID

FLORALS

I am very excited to be a part of these collections! There are a lot of really great designs. One thing I find very interesting, similar to when I have participated in a Spoonflower limited palette challenge, is how very different the colors can look when applied in different combos and ratios from different designers. For a collection that was limited in color… the spectrum of design differences is big! And really quite fun! Between the 6 sub-collections there are more than 1000 designs from 59 different designers… there should be a little something for everyone!

We are using the hashtag: #designerspr22 on all our social posts and designerspr22 as a search tag on Spoonflower in case you would like to follow along with everyone’s posts or see all the designs not divided by collection.

I will end this post with one final look at all of my designs in a collage together.

And as always… Thanks for reading!

Brenda

Autumn Artwork Showcase

Hello All! It has been quite a long time since I have written a new blog post. I never intended to take such a big break. Oops! We are long past welcoming in Autumn, but since it is my FAVORITE season I thought that before it exits I could dedicate a post to some of my Autumn Art!

My Spoonflower Shop has so many designs tagged Autumn and/or Fall I decided to dedicate an entire COLLECTION to the theme. These designs are gathered from many other Collections and do not all necessarily color coordinate with one another, their common bond is that they evoke the colors or images of Autumn.

One of the designs in that Collection and actually one of the very first patterns I ever uploaded to Spoonflower is my Pumpkins and Squash Design. This one I adapted from a note card I designed.

I also have a design that features only Pumpkins. I created this from an Illustration I did for the Alphabet Fruit and Veggie Challenge from a few years back. As you can see Geometric Pumpkins is VERY different in style. This is interesting to me. I think my signature style is definitely more refined now and while I don’t feel the need to make everything geometric I do tend to gravitate to that stylistic choice a lot. If I was going to choose a pattern that felt more “me” I would choose the geometric pumpkins…

I didn’t do a regular Art Challenge in 2021 (which is of course just one of the many reasons for the lack of blog posts) but I have done a few different ones in the past. You might recall the monthly architecture/house illustrations I did where I followed along with the seasons. I ended up with two fun Autumn themed illustrations in that batch:

I also had a year long Alphabet Animal Art Challenge. I did NOT have a turkey included in that Collection. But I eventually created one in the same style. I am not sure if an animal can really qualify as a seasonal species but if there was an autumn specific animal I think it would definitely have to be a turkey! I did two versions of this cute guy. The second time giving him more detail and some Thanksgiving garb!

I’ll end this post with a look at a few more patterns from the autumn colorway of my Kiku Garden Collection:

I hope you have enjoyed this little Autumn design tour! Do you have a favorite from this mix? Are you an Autumn lover too? As always feel free to drop a comment! And enjoy the season!

Brenda

Fruit and Veggie Art Challenge: Year End Recap

alphabet art challenge 2018 final review by brenda zapotosky

Today I am bringing you the Year End Recap for the Fruit and Veggie Art Challenge and I am very excited to be wrapping things up!  Actually… this is sort of a Part 1 as I have a follow up post planned… but more on that at the end.  And if this the first time you are hearing about this challenge, you may want to read the orginal challenge announcement HERE.

Let’s begin with a look at all the fruit and veggies I illustrated this past year:

26 fruit and vegetable illustrations by brenda zapotosky

I think it is such a fun and colorful collection!  I love seeing them all together like this.  My design parameters for this challenge were to do a geometric interpretation of the fruit/veg which included simplifying shape lines, segmentation, and using hatch, dots etc. to create texture.  You may notice that all the boards also include a background rectangle(s).  This was not originally planned, but I added it for the asparagus to fill in the white space and liked it so much I decided to make it a standard feature for all the boards!  Overall, I am extremely happy with this collection as a whole.  I already shared favorites and other thoughts in my quarterly recaps so I won’t do that again.  If you missed any of those, they are all linked at the end of this post.

As with last year, one of the goals of this challenge, besides committing myself to creating new art on a regular basis, was to create a library of illustrations that could be used in other ways.  I would definitely consider this aspect a success.  I created three new patterns which incorporated one of more of the fruit/veg and have ideas for a few more in the future.  I have also had a request for a poster version that would include most of the illustrations. This will be similar to the animal art poster I did last year but smaller and probably without the words. You can see that poster in THIS post.

Two patterns I created featured just one illustration:  Geometric Carrots and Geometric Strawberries (which has two different colorways).

carrots and strawberries patterns by brenda zapotosky

I also created a pattern that uses many of the above fruit/veg along with some other ones not part of the alphabet collection.  Geometric Taco Bar was created for a Spoonflower contest.

Geometric Taco Bar Pattern by Brenda Zapotosky

All of these designs can be found as fabric, wallpaper and gift wrap for sale in my Spoonflower shop.  Along with several other geometric food designs from the past.  Here is a link to the entire Geometric Food Collection.

The other major component of this year long challenge was the Letter Prompt lists that I posted at the beginning of each fortnight.  These prompts included an original block letter and a list of fruit/veggie ideas that began with that letter.  Here are all 26 together:

26 fruit and vegetable letter lists by brenda zapotosky

I tried to include 7 options for each letter but as you can see that wasn’t always possible.  I enjoyed learning about different fruit/veg I had not heard of before. The font is an expansion of a slightly more simplified block font I had started a few years ago. (You can see an example of the letters on my Colorful Merry Christmas Text pattern.) I had been adding to it as needed so not all the letters were there. AND I modified the look of most of them and added all the hatching.  It was nice to create a font in increments like this. It made it much less tedious.  I am super happy with the alphabet as a whole:

stripey block font by brenda zapotosky

I definitely plan on making a repeating pattern with these letters.  And I am excited to play with lots of color variations!  Plus, now I have it to use for future projects!  WIN!

Overall I think I can call this year long challenge a success!  Admittedly, I wasn’t always enthusiastic to work on some of them.  And I was definitely happy to reach the end.  But looking back on the library of illustrations and letters I now have I am happy I did it!

And… so did two others!  Yup!  Two fellow artists followed along and completed *most* of the challenge!  Since their work is so different from my own and I knew this blog post would be long to begin with I have decided to give them their own Featured Artist Post. COMING SOON!  (I will link it once it is live).  You are definitely going to want to come back and see their beautiful creations!

And as mentioned above, in case you missed any of the previous posts about this challenge here are all the links:

EDITED:  The bonus Artist Feature post is now up!

Finally there IS a new challenge for this year!  We are still in the middle of letter A so if you feel inspired to join in you still can from the very beginning!  The theme is CITY and you can read all about it HERE. Or you just follow along with me!

Do you have a favorite?  Any fruit or veggie you would like to see as a pattern?  I would LOVE to hear from you in the comments!

Thanks for reading!

Brenda

Announcing the 2019 Alphabet Art Challenge!

It is that time of the year again friends.  Time to announce the theme for next year’s Alphabet Art Challenge.  I have to be honest… I seriously considered NOT doing a 2019 challenge.  They are a lot of work and sometimes the obligation to create something was more annoying than fun.  I am hoping with a little reworking of my task parameters it will be a bit easier this time around.  This will be the third year I am hosting this challenge.  You can read about the original 2017 Animal Challenge HERE and last year’s 2018 Fruit and Veggie Challenge HERE.

Ok.  Without further ado the 2019 theme is: CITY!!!

REVISED Alphabet City Art Challenge Title by Brenda Zapotosky

One of the reasons I decided to do a 2019 challenge is this theme.  I already have a CITY Collection in my Spoonflower Shop and I want to use this year of illustrations to grow that collection of patterns and expand into other coordinating works including greeting cards.  For those who may not know, my field of study was actually Architecture and I have found that designs of mine that incorporate buildings etc tend to do well.  I would like to play on this strength but also still challenge myself.  I think this challenge will do both.  For each letter of the alphabet I will create something CITY related.  This could be a building:  bank, library, skyscraper etc.  But I am not limiting it to only buildings.  ANYTHING that can be found in a city is fair game.  (And let’s face it, creativity will probably be required for some of the letters!).

One big change I will making for this year’s challenge is that I will NOT be posting a list of prompts for each letter.  My original reason for doing the lists was to give others ideas of what they could create for each letter.  And while these lists DO get a surprising amount of likes on Instagram, those likes do not translate into others actually participating in the challenge.  And since I don’t need the lists myself, eliminating them will take off one of the burdens from past challenges.  I do plan on posting a LETTER on each start day as a reminder of the start of the next 2-week period (more on that below).  For the 2018 challenge I decided to create a letter for each week.  I hope to do the same this year, although I haven’t decided exactly what I want the font collection to look like.

Stylistically I will be keeping with the already established look of the existing City Collection and only use the colors in its palette.  I actually enjoy working with a limited palette… I like having limitations!

This is my Around the Town design.  It is a good example of the style and colors you can expect to see from me this challenge!

Around the Town Promo by Brenda Zapotosky

HOW THE CHALLENGE WORKS:

Now for the official “rules” for this Challenge.  There are 52 weeks and 26 letters, so that means 1 letter for every 2 weeks.  Even though 2019 starts on a Tuesday, I have decided to keep Monday as the starting day for each new letter.  And in order to not delay a full week, Monday Dec 31 will actually kick off the letter “A”. On each Monday when a new letter begins I will post a reminder on Instagram with the letter for that 2-week period.

As it was for past years, this is JUST FOR FUN!  There are not any prizes for participating.  You can use any type of medium you like to create your art.  And if you are late to join in or miss a letter or 2, that is totally fine!  Depending on participation I will try to share other artist’s work who are regular contributors to the hashtag.  So if you want to be included don’t forget to use the official tag:  #alphabetcityartchallenge on all the pieces you create!

That’s it!  I have one more creation left to finish for the 2018 Fruit and Veggie Challenge and then there will be recaps for both the last quarter and the entire year coming to the blog in January.

In the meantime you can check out the hashtag:  #2018fruitandveggieartchallenge to see all the that has been posted this year by myself and others! (There have been 3 of us posting to it regularly). And (if you are not already) I recommend following me on Instagram so you are sure to see all the posts that are to come!

If you have any questions feel free to ask!

Happy Almost New Year!

Brenda

Fruit and Veggie Art Challenge: N-S

It is time for the 3rd “Quarter” Recap for the 2018 Fruit and Veggie Art Challenge!  Letters N thru S were an interesting group and I am beginning to see some of the limitations of my “geometric” design criteria. Before I jump into my thoughts on this group let me share my 6 fruit and veggie creations for this portion of the challenge:

N thru S Fruit and Veggies by Brenda Zapotosky

Overall I really like this group.

You may notice that the pear and quince are quite similar.  This was completely intentional.  I thought since their shapes are so similar AND they are in season around the same time that it would be nice to have them “go” together.  While I already have a Geometric Apple pattern in my shop, I think I would like to do a new apple that matches the style of the pear and quince and create a pattern using all of them.

Also, I had an interesting creative process with a few of these.  I recently created a new pattern, Geometric Taco Bar, that includes a variety of fruit/veg, including both the onion and the radish.  The letter “O” fell during the time that I was making the pattern so it was created for both at the same time.  As for the radish, that was created for the pattern first, but I did not feel compelled to do another “R” fruit/veg when it arrived, so I simply composed a board featuring the Radish.

Geometric Taco Bar was created for a Spoonflower Design Challenge and is available in my shop!

Geometric Taco Bar Pattern by Brenda Zapotosky
Geometric Taco Bar is available as gift wrap, wallpaper, and fabric.

I also included both the Jalapeno and Iceberg Lettuce which were created earlier in the Challenge (adding in slices of each).  I love this pattern.

It is hard to pick a favorite in this group.  I am actually more prone to pick a least favorite:  The nectarine!  It is difficult to differentiate between the specific varieties of round fruits especially in the geometric style I have chosen.  I like the cut view of the nectarine better and do think it captures the essence pretty well.  This difficulty is one of the limitations I was referring to at the start of this post.  I am also finding that even in the “non-circle” fruit/veg that there are a lot of similar looking shapes.  For example, radishes, beets and turnips, when drawn in the geometric style are also hard to differentiate.  The same would hold true with leafy greens.  Hopefully enough unique shapes will present themselves as I complete the challenge.

One fun aspect of this group is that half of them have been included in surface patterns! The onion and radish are both part of the Geometric Taco bar design.  Additionally, I love the strawberry so much I already created a pattern for it!  This pattern will be added to my shop very soon. So that is 3/6.  And, as I have already mentioned, I hope to create a pattern using both the pear and quince together. One of my favorite aspect of this challenge is a library of illustrations to use in other applications.

Speaking of the strawberries, I wanted to share a look at the pattern!  I have ordered the swatches, so it will be in my shop soon.  But I do want to say it COULD CHANGE.  I often tweak designs after seeing them printed, so this is how it will tentatively look.

Geometric Strawberries Classic Pattern by Brenda Zapotosky

This is the Classic colorway.  I also created a Pinky colorway too! I’ll update this post when they are available in my shop.

And that’s a wrap!  Looking forward, I expect this final batch of letters to be challenging.  For the most part I do not look at the options for a letter until I make the prompt list, so there is a chance that I will be surprised, but I think the options for everything but “T” to be very limited.  Follow me on Instagram if you want to see each letter (and the prompts as I create them).

As always, thanks for reading!

Brenda


UPDATE: Alphabet Animal Art Challenge – 6 months later

Alphabet Animal Update Title

With the end of June it has officially been six months since the 2017 Art Challenge:  Alphabet Animals has come to a close.  I wanted to do an update since I have used those animals I created in quite a lot of new designs!  One of the goals of the Challenge was to create a library of illustrations I could use in various ways and in that goal I have had much success!  So today I want to share all the creations that I have made since the challenge ended.  If you are hearing about this challenge for the first time you can read the final blog post recap and see ALL the animals.  You can also see the other designs I created last year.

SURFACE PATTERNS

I’ll start with surface patterns.  All these have been created this year, so after the close of the challenge.  Since in many cases I ended up tweaking the animal illustrations I will share a look at the original animal and the pattern side by side!

All of the patterns I have created this year with animals so far have been created specifically for Spoonflower Design Challenges (although one did not end up being entered as you will soon learn).

Modern Farmhouse

Quail Illustration by Brenda Zapotosky

As you can see for this pattern the quail is playing a supporting role. I removed its top plume and did some recoloring to make it more “generic bird” versus a quail specifically.  I really love how it fits in so well with the other farmhouse images I created.  Modern Farmhouse is available in my Spoonflower shop.

Elephants and Polka Dots

Elephant Illustration by Brenda Zapotosky

For the “Endangered Species” Design Challenge I chose to feature my elephant illustration.  I didn’t make many changes to this character.  I changed the toe nail color to white and made the line weights for the facial features a little thicker.  (And overall color changes of course).  Since my elephant already had a unique polka dot detail I decided to build upon that for the pattern.  I actually created 4 different colorways of this design.  The Taupe colorway one you see here is the version that was entered in the contest.  You can find it and the 3 other colorways in my Animal Fun Collection.  This was actually the second time this elephant was selected from the library.  Last year I created a greeting card featuring the elephant!

Hedges and Hedgehogs

Hedgehogl Illustration by Brenda Zapotosky

The idea for this pattern was in my head almost immediately after creating the original hedgehog so I was very excited when the “Animals by Land” Design Challenge was posted giving me the perfect excuse to create it!  I kept the hedgehog mostly the same but tweaked the facial features again on this one, the most noticeable being that I gave it a round eye.  I think it is cuter that way!  The hedges got a bit more colorful too!  Find Hedges and Hedgehogs in my Spoonflower shop!

Mostly Happy X-Ray Tetras

X Ray Tetra Illustration by Brenda Zapotosky

Last but not least is my X-Ray Tetra.  For this one, I kept the pattern simple since there is already a lot of detail in the fish itself.  I did play with adding some polka dots, but I didn’t like them.  I did, however, do a fun little switch-up!  As the title suggests, not ALL these tetras are smiling… I added some frowny ones to the mix and reversed their coloring in places to make them just a bit more distinctive.  This design was created with a contest in mind but was never entered because I got the THEME wrong!!!  I thought it was Animals by/in/of WATER since the previous two contests were Land and Air… but for this one Spoonflower mixed it up and themed it “Animals of the OCEAN”.  Technically tetras are not ocean fish (which I learned through research, I am not a fish expert!) and I did not feel right entering this design.  Oh well… at least it gave me the motivation to create it since this was also a pattern idea I had in my head for a while!  Mostly Happy X-Ray Tetras is also available in my Spoonflower shop.

GREETING CARD

I have created one new card since the close of the challenge.  I have a niece and nephew who both turned 3 in June (cousins, not twins) and I thought the koala was a good pick since it was already holding onto to something making it easy to swap in the number 3. I also changed the hat to a party hat. I left the koala itself the same (even the position of the arms worked as is for the number 3!)

Koala Illustration by Brenda Zapotosky

I was there when my niece opened her card and upon seeing it she recognized it as a koala!  Granted she had recently seen a show that had koalas, but still, it made me really happy to know that my characterization was accurate enough for her to name the animal specifically!  I call that success.  The koala cards joins several other animal cards I created last year which you can find on my Cards and Gift Wrap page.

ARTWORK

The biggest thing (literally) that I created with the animal illustrations is a poster that incorporates ALL of them!  As I mentioned above my niece and nephew turned 3 and I decided that for their gifts I would create this poster.  It was actually quite a bit of work to pull it all together and fit them in a logical way and adding in all the text circles, title, etc.

Alphabet Animals Poster by Brenda Zapotosky SM

In addition to removing all the “props” that were originally paired with I also did some minor re-scaling, both enlarging and reducing scales of some of the animals to get them to work better as an ensemble.  Other than that all the animals except one stayed the same as the original in look and color (all the tweaks I made for the patterns came later).  The one animal that DID get changed was the armadillo since that was my very first illustration and it did not have the same “cute” look that I started with letter B.  Here is the “Before” and “After”.

Armadillo Illustration by Brenda Zapotosky

It was actually my husband who suggested I make them “cuter” after seeing the first animal, armadillo.  I am so happy he did, because it definitely enhances my already slightly cartoon-ish interpretations.  And I am glad I changed up the armadillo for the poster!

It is definitely a bit of a gamble to give the gift of art.  Especially BIG ART that is intended to be hung in someone’s house.  I took that chance because I thought my niece and nephew as well as their parents would like the gift.  And because I expected these to be hung in the kids’ rooms and not the main house.  I am so happy to report that gifts were well received AND have both already been hung!  Here is a look at the posters “in the wild”.

Posters in the Wild

I printed these posters at a standard 20″ x 30″ but sized the poster border proportions to work with a favorite IKEA frame line that I love (Its similar sized frame is 19.75″ x 27.5″). (Seriously, almost every wall frame in my house is from this line).  For the smaller frame on the left (which I framed) I trimmed it to fit the slightly smaller proportioned frame.  My sister opted for the same IKEA frame but with bigger dimensions so it has a mat (on the right).  It is fun to see the two looks side by side.

My husband’s reaction to seeing the poster for the first time was that I should sell them!  After selling greeting cards for a number of years I decided that being a producer really wasn’t for me.  I have been focused for the last several years solely on designing and selling my work where someone else does all the work.  However, these posters, which I am extremely pleased with, have me actually considering maybe selling (on a VERY limited basis) again.  It is just an idea at this point.  I would probably sell them both wholesale and retail if I did.  If you are a retailer or an individual and would be interested please let me know!  If there seems to be enough interest I would start investigating larger quantity printing!

And that about wraps it up!  I anticipate using more of these animals in future design projects.  Do you have a favorite you’d like to see used in something?  I’d love to know!

Thanks for reading!

Brenda

Fruit and Veggie Art Challenge: A-F

It is here!  The first blog recap of the 2018 Fruit and Veggie Art Challenge!  6 letters and 12 weeks completed!  Wow.  This new theme has been quite fun and overall, for me at least, easier than the Alphabet Animal Art Challenge from last year. If this is the first time you are learning about the 2018 Alphabet Art Challenge I recommend reading this blog post first.

Also, a side note:  I have been struggling with what simple word to use when writing about my illustrations.  I have settled on the generic combo fruit/veg to try to make things as simple as possible 🙂

Let’s start with a look at the first 6 illustrations I created:

A thru F Fruit and Veggies by Brenda Zapotosky

4 Veggies and 2 Fruits so far.  As I shared in the original blog post for this year’s theme, in addition to the Alphabet Fruits and Veggies I am also giving them all a “geometric” flare.  I am absolutely loving this twist on the theme as it frees me from trying to exactly recreate the fruit/veg I have chosen and gives me a bit of creative flexibility.  It is quite fun to choose my fruit/veg then think through the best way to geometrically create it.  In addition to the fruit/veg itself each illustration has a rectangle and hatching as part of the composition.  I added this for the first item, asparagus, to fill in the blank space and liked it so much I decided to make it a standard element for all the illustrations.  I think my favorite illustration this round is the Fennel, it was such a perfect fit for my geometric style.  Here is a closer look:

F is for Fennel by Brenda Zapotosky

I also really like the carrot.  In fact, I have already made it into a repeating pattern and added it to my Spoonflower Shop!  I think this Geometric Carrots print would be especially fun for the kitchen!

Geometric Carrots Pattern by Brenda Zapotosky Outlined


I anticipate more patterns in the future and probably a few that incorporate more than one fruit/veg. Those will probably come closer to the end or after the challenge once I have an entire collection.

Probably the biggest challenge I have encountered so far is fitting the fruit/veg well on my template.  I really liked the framed square I used for the Alphabet Animal Art Challenge and definitely wanted to keep the square format for this year too, however, so far the fruit/vegs have been much more vertical than the animals. Had I thought of this before starting I might have tweaked the format of the squares.  This is another good reason to incorporate the background rectangles and sticks as they help to fill the space.

Like last year, I extended an invitation for other artists to join me in the challenge. Not sure if fruit/veg are less appealing than animals, or that others found it too difficulat to stick to a year long challenge, but participation is down from last year.  (Actually last year started strong and then eventually everyone except myself dropped out).  3 other artists started the year with me.  I wanted to give them a shout out because I loved that they joined in.  And since there are less options with fruit/veg there were often repeat picks which I think is quite fun.  You can see all our creations on Instagram via the hashtag for the challenge:  #2018fruitandveggieartchallenge.  You can also check out all of the artist’s individual feeds:  onecreativechameleon, deevlasak, and jillbyersdesign

Jill from jillbyersdesign is the only artist that has also completed every letter and I wanted to give her a special mention!  She is also using a consistent design style and I absolutely LOVE how her collection is coming together!!!  Her style is so different from mine which is super fun.  Painting is NOT my strength, but I have done it enough to really appreciate the gift in others.  Jill definitely has the gift.  Here are her first 6 fruit/veg paintings!

Jill Byers A-F

So gorgeous, right?  I highly recommend giving her a follow on Instagram.  You can also find more of her work on her website and in her own Spoonflower shop (which is how we “met” in the first place!)

Speaking of other participants… you could still join in if you wanted!  I think that the fruit/veg are so much faster to create you could easily catch up at this point.  Or simply start at the latest letter:  G!  I even create a prompt list for each letter to give you ideas.  Find the latest one here.

I think that about covers it all.  I would love to hear which fruit/veg is your favorite!  Or any other comments you may have 🙂

Thanks for reading!

Brenda

Sewing and Design Meet: Transit Lines

Sewing and Design Meet Logo

It is time for another edition of Sewing and Design Meet!  This time I am sharing about my Transit Lines design and the tote bag I made with it. This design is part of the City Collection which can be found in my Spoonflower shop.

DESIGN:

Transit Lines by Brenda Zapotosky

When putting together a new collection I don’t often sit down and sketch out ideas for coordinates but for CITY I actually did.  My original idea for the Transit Lines design was to have criss-crossing lines going in many directions, similar to a subway map.  However, as I started drawing it in Illustrator I really loved the look of just the horizontal lines with the thickened bars and decided to take it in that direction instead.  I love how the pattern is a versatile stripe and yet, when paired with its title, can easily (I think) invoke images of the city site that inspired it.  Whether you interpret the thick bars as trains or stations is up to you!  I also really love the color palette I decided on for this print: mostly neutral but with pops of color.

FABRIC: 

Transit Lines on Eco Canvas by Brenda Zapotosky BLOG

A few years ago Spoonflower had an awesome and rare 50% off sale on Eco Canvas and I ordered a couple of yards.  One yard I divided into (2) 1/2 yard pieces with the intention to make a tote bag with each of them, although at the time I did not have a specific pattern picked out.  I ended up choosing free tote patterns from Purl Soho for both of the totes.  I have a previous blog post about the first one I made, the Railroad Tote, and some zipper pouches I made with the extras.  I chose the Everyday Tote for the Transit lines design as I thought the more horizontal shape would suit it well.

The Eco Canvas has pluses and minuses for me personally.  On the plus side: It washes and sews well and colors are bright and vibran.  On the minus side: It is  much softer and drapier than other canvases which is something I do not like.  But I think this is really just a personal preference. I gave the Railroad Tote to my mom and she loves that soft quality.  When making the zipper pouches I decided to interface the Eco Canvas portions and I was much happier with the structure.  So for the Everyday Tote I knew I wanted to interface those pieces.  I needed to do some construction changes to accommodate this (Along with a bunch of other construction changes) which I detail below.

SEWING:

There were a lot of steps to making this bag, including some extra ones that came along with my changes, but otherwise it was straight forward and easy to sew.  I didn’t take a lot of in-progress photos (my sewing space is not photo friendly) and it was difficult to get a good overall look of the bag.  Here is the best one:

Transit Lines Tote by Brenda Zapotosky 3

As mentioned above, I made several construction changes when sewing up this bag.  I knew I wanted to interface the Eco Canvas pieces and since the bag isn’t lined, I needed to underline at least those portions so that the interfacing was not exposed.  After contemplating solutions for this, I decided to also change how the bag panels were sewn.  Per the instructions, you cut two full side pieces from what eventually becomes the “upper” fabric, and then cut bottom panels of the “lower” fabric which go over top the first fabric on just the bottom portion.  There are some good reasons to sew the bag this way.  It ensures you aren’t relying on a horizontal seam to hold the top and bottom half of the bag together and it creates a nice double layer for the bag base.  But, it meant that 1/2 of my good patterned fabric was going to be covered which I wasn’t crazy about.  So, I decided to instead cut both pieces at half height and let the seam where the bias “piping” detail is connect them together.  Since the bag side pieces were already cut, I chose to cut one in half height wise and that determined the height of my bag (and preserved a nice FQ sized piece of the Transit Lines for a future project!).  I sewed the top and bottom halves together with the accent bias “piping” in between.  I then UNDERLINED the entire height of the bag sides with a coordinating quilting cotton that I had leftover from the previous Eco Canvas projects.  I quilted this to the bag panels which helped provide the extra stability I lost when I changed the construction.  The quilting, despite using a walking foot AND having design lines to follow, is kind of wonky… Quilting is not my forte!  Despite the lackluster quilting, I absolutely love the end result inside the bag.  I think the quilted underlining really gives the bag a high quality look!

Transit Lines Tote by Brenda Zapotosky 1

Other changes I made:

  • I flip flopped from the directions which fabric I used for the front and back of the pocket so that I could enjoy more of the print.  I also made the pocket wider since there was plenty of room to do so.
  • I changed the order of sewing so that the folded over top hem of the bag was sewn last.  I did this on my Railroad Tote too.  By saving it until last the tops of the side seams are concealed instead of exposed.
  • Longer straps.  I like to wear my bag over my shoulder and longer straps make it more comfortable when I do.

I chose to use 2 different colors of bias tape instead of one and I am very happy with the results.  On areas where I wanted the trim and finishing to stand out (like on the exterior seam or around the top of the tote fold over hem) I used black.  To finish all the interior seams I used white.

Transit Lines Tote by Brenda Zapotosky 5

Transit Lines Tote by Brenda Zapotosky 4

Transit Lines Tote by Brenda Zapotosky 6
DETAILS! Pretty details are one of the “perks” of sewing your own!  Like rotating the print to be vertical on the pocket.

The webbing I used for the straps (linked at the end) is a bit industrial.  It works ok… especially since the Eco Canvas is also a synthetic, but I wouldn’t get it again.  I purchased a large roll of it and have a lot leftover, so it will probably pop up in another project at some point. It was a really good deal though, and should be pretty durable (I hope).

I was hoping that this bag would work as my music bag and I am happy to report that it works perfectly!  My previous bag was a freebie tote that I got when I worked in Architecture.  It was rather ugly and advertised a window company that I am not even a big fan of (otherwise I might have posted a “before” photo).  I love having my new “chic” bag that is me-made and features one of my own designs!  It holds all my music, books, and misc. with room to spare! (And even packed can sling over my shoulder!)

Transit Lines Tote by Brenda Zapotosky 2

DETAILS SUMMARY:

(I have seen others do a summary like this and think it is a fun way to provide quick access info all in one place. I will probably make it a regular feature of my sewing posts.)  

Pattern:  Free Everyday Tote from Purl Soho

Fabrics:

Notions:

  • Pellon Interfacing, Lightweight, Fusible (I can’t remember the exact #)
  • 1 package each white and black bias tape
  • HipGirl 1 1/4″ Black Polypro Webbing
  • Sewing label designed by me and printed by Spoonflower

That about wraps it up!  If I missed a detail that you would like to know about feel free to ask in the comments!

Thanks for Reading!

Brenda