Happy Day!
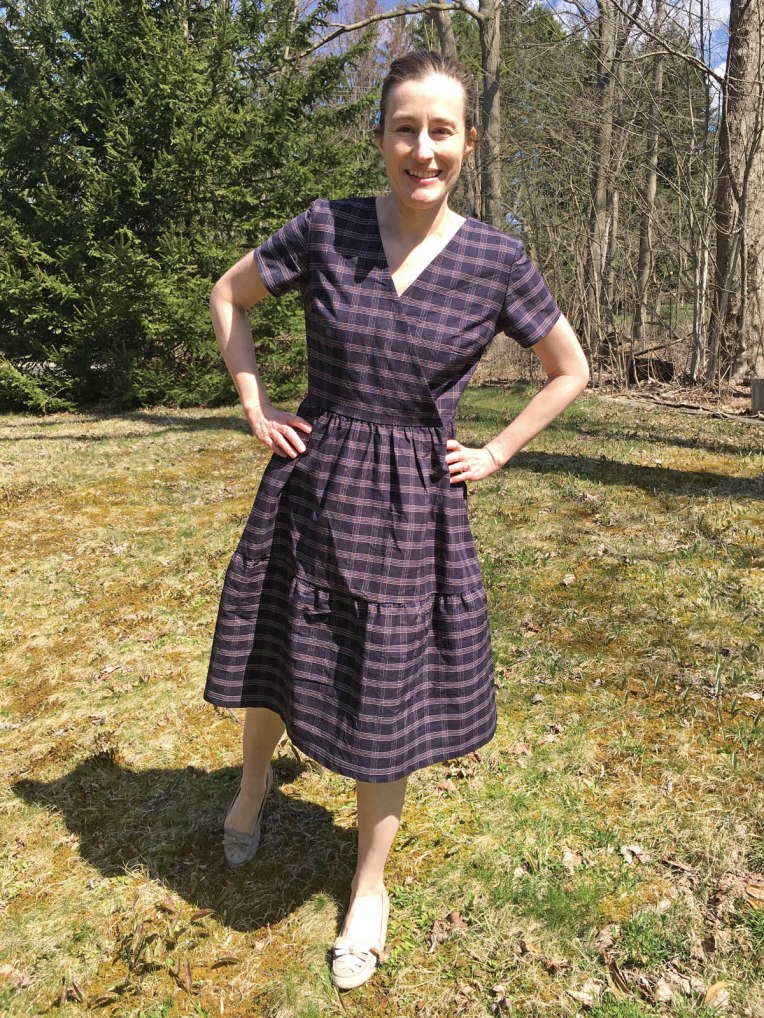
I am here to share that I have another guest blogger post up on the Cali Fabrics blog! This time I am sharing a plaid Madrid Dress by Coffee and Thread! I’d love for you to check it out: Boho and Preppy Meet
Happy Day!
I am here to share that I have another guest blogger post up on the Cali Fabrics blog! This time I am sharing a plaid Madrid Dress by Coffee and Thread! I’d love for you to check it out: Boho and Preppy Meet
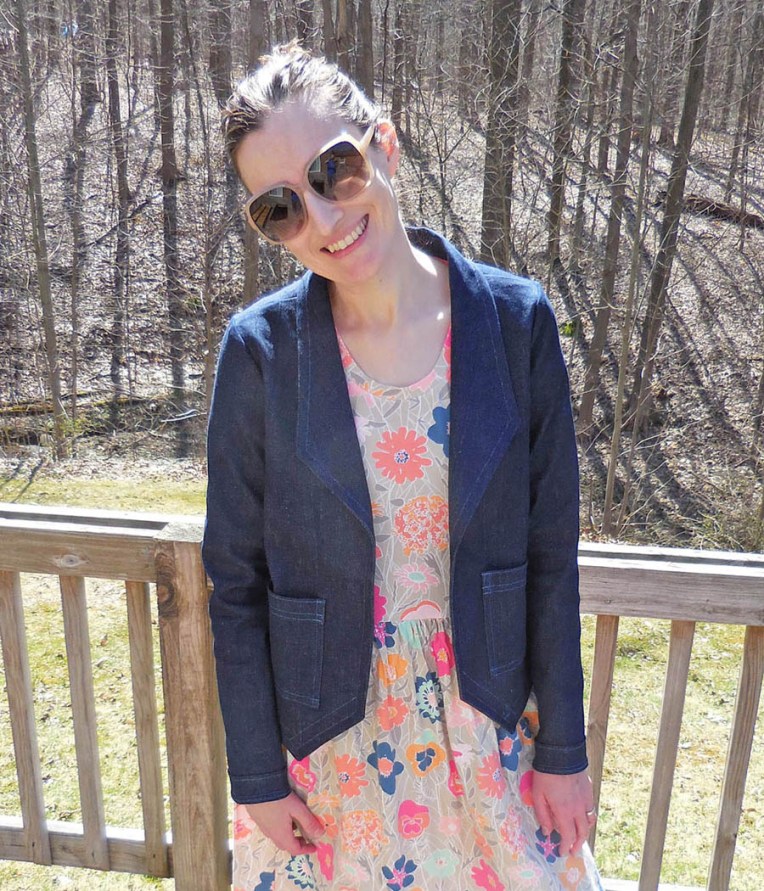
Hey All! I have a fun sewing project to share with you today… On ANOTHER blog! I am excited to announce that my first Guest Blog post for Cali Fabrics is up on their blog today! I am sharing a Morris Blazer I made out of some awesome stretch denim. A “Not a Jean Jacket” Jean Jacket! I’d love for you to head over to the Cali Fabrics Blog to read all about it!
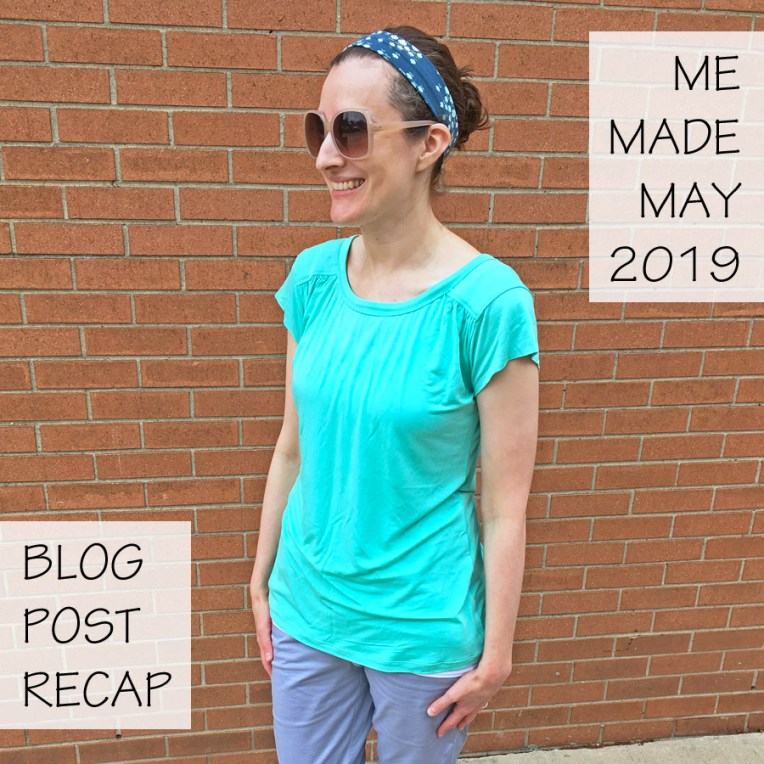
Hi folks! It is time for my Me Made May 2019 recap! If you follow me on Instagram you have seen some of the looks already, but this is the only place I am posting ALL of the outfits. As in past years I am grouping them by week and numbering them by DATE. Also as in past years, I only took photos on the days I was out and about in “real” clothes. Honestly I have TONS of lounge and pajama bottoms that I wear almost daily, so I was probably wearing something handmade most days, but I did not document those.
This May was a lot cooler than in past years! (No complaints there, I LOVE cooler weather, anything over 80 degrees Fahrenheit is too hot for me!) So you’ll be seeing lots of layers. Most of what I wore were older garments. I thought I was going to weave in some of my newest makes (including a brand new pair of cropped pants) but the warm enough days did not coincide with the opportunity to wear them. Since most of these makes are older, I will only be linking to my own fabric designs, since those are still available. I will link to all the patterns I used the FIRST time they are shown. So if you don’t see a link, scroll back up to the first time I mentioned the pattern. Also, I apologize in advance for the grainy selfies. We don’t have a great place to take photos inside our house and the ipod I used to take them doesn’t have the greatest resolution. Ok. Let’s dive in!
WEEK 1:
No documented outfits
WEEK 2:

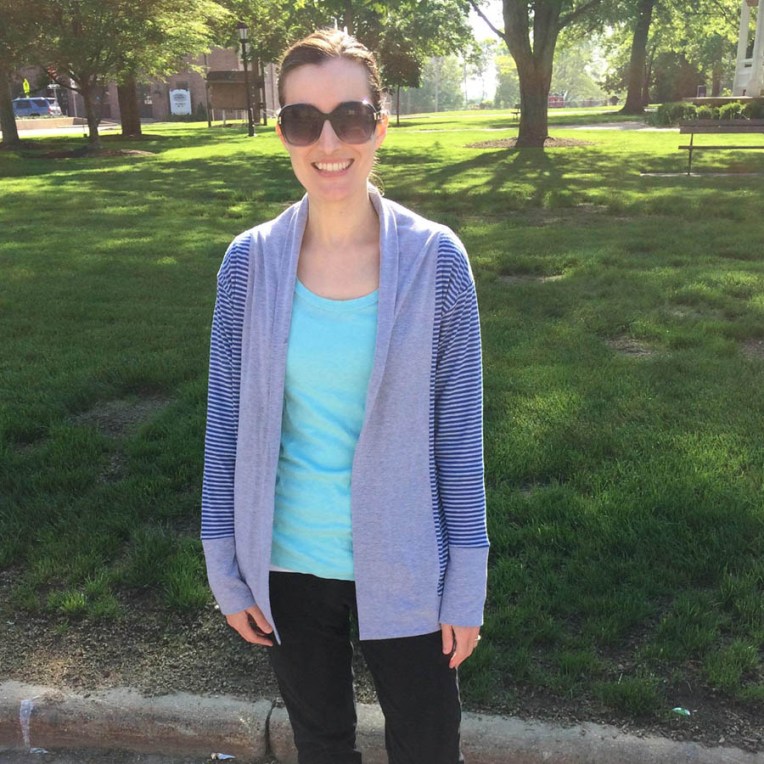
May 5: Oslo Cardigan by Seamwork, Lane Raglan by Hey June Handmade, Infinity scarf featuring my Spines (Siesta) design printed on Cotton Spandex Jersey. The Lane and Oslo patterns, in my many variations, are both on heavy repeat this month. They are wardrobe staples… as are scarves!
May 7: Almost a repeat of May 5!!! Ha Ha. Oslo Cardigan, in fleece this time, Lane Raglan, Infinity Scarf featuring my SW Triangles Haze design printed on Modern Jersey, and thumbhole wrist warmers made from the same fabric as the Lane.
May 10: Another Lane! Another Infinity Scarf! But a different cardigan this time! This is the Blackwood Cardigan by Helen’s Closet.
WEEK 3:

May 12: RTW inspired french terry pull-over that was a mash-up of the Halifax Hoodie by Hey June Handmade and the Tabor V-Neck (hem detail) by Sew House Seven with some custom detailing (like the yoke and top-stitching) to mimic the RTW look. I posted more photos of this make and more details in THIS post.
May 14: Julia Cardigan by Mouse House Creations and a Lane Raglan. This lane is made out of Robert Kaufman Laguna Knit, it is one of my absolute favorite CL. Lighter and drapier than most, but still a nice weight. A lot of my me-mades in this post were made from it (Including the May 10th Lane and the May 17th Lane). You can find it in a lot of online stores.
May 17: ANOTHER Lane Raglan (custom sleeve length).
May 18: Another Julia Cardigan, this time paired with a custom tee pattern I have been developing from the Renfrew Top by Sewaholic. It is my “fancy” tee version. Actually, since taking this photo, I have modified the neck finish one this one so it dips down more. Bag is also me-made.
WEEK 4:

May 19: Chambray Cheyenne Tunic by Hey June Handmade with custom short sleeves. This was a newly “made over” garment and I was super excited to bring back into rotation. I shared about my modifications in THIS post. I was most likely wearing a handmade cardigan over top but I honestly can’t remember which one and I don’t have a photo with it.
May 24: Oslo Cardigan, Knit Skirt (self-drafted starting from a RTW skirt) and Infinity scarf featuring my Petal Potpourri (Bold) and Sprigs and Leaves (Bold) designs printed on Modern Jersey.
WEEK 5:

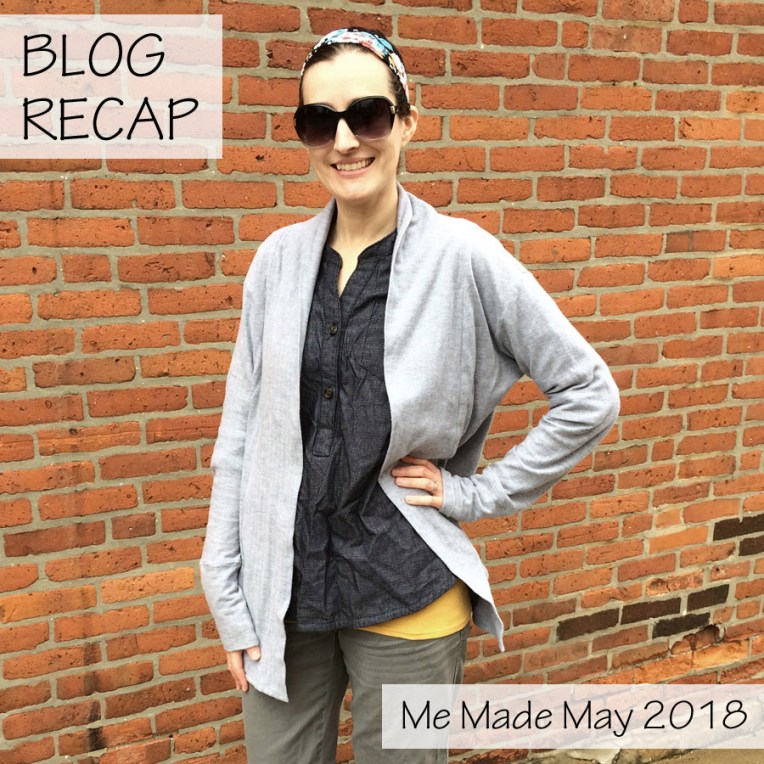
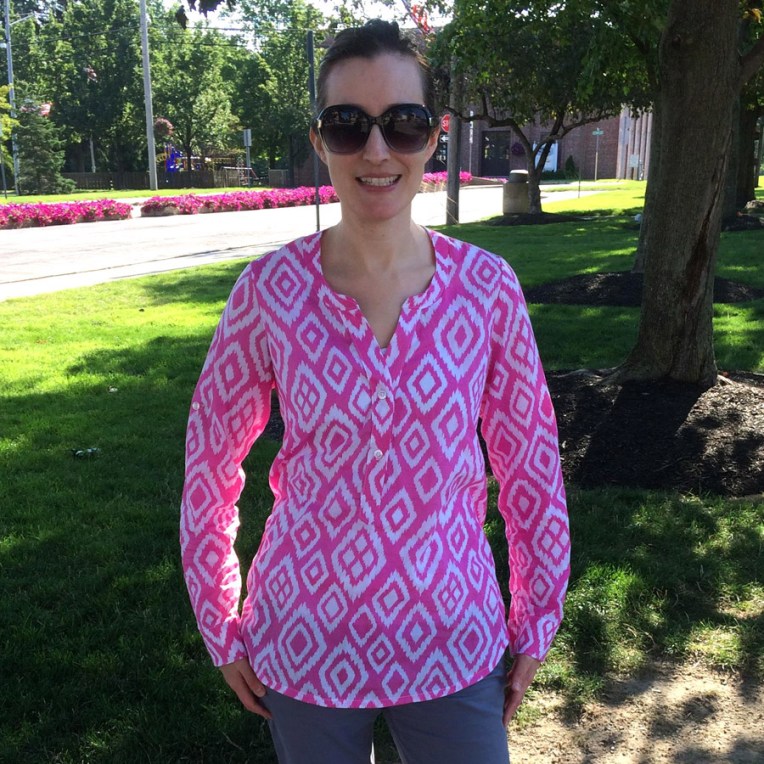
May 26: Another Oslo Cardigan over a brand new make, the Chai Tee by Liesl & Co. View of just the top is the first photo of this blog post so you can have a closer look. I shared the details in THIS post. Headband is also me-made.
May 28: Halifax Hoodie (An actual zip up hoodie version this time), Another version of my custom Renfrew hack fancy tee, and handmade tote. I call this one my cool tones geometrics tote, made with all my original pattern designs. You can see a close up look at it in THIS post and find the fabrics in this COLLECTION (a few have been modified in scale, color, etc before I listed them).
May 29: Morris Blazer (with quite a few mods) by Grainline Studio and a Renfrew Top by Sewaholic (This time MOSTLY per the pattern, I did eliminate the short sleeve bands, which you can’t see anyways). The blazer was made a while ago, I shared all the mods in THIS post.
May 31: Last Day! We actually took a road trip to IKEA that day and I was SUPER comfy in these #secretpajamas Oslo Cardigan (same one as on May 24) and my first ever Coastal Breeze Dress by Make it Perfect (also made in RK Laguna knit). I have since made 3 more of this dress. Another favorite pattern.
FINAL THOUGHTS:
Overall I would call Me Made May 2019 a success! Sure, I had a lot of pattern repeats, but I am ok with that. One of the things I love about sewing is getting to create garments that really work for me and my body. And when I like a garment, I make a lot of them! Especially since I often do a lot of mods to get them how I want them, might as well maximize that effort. And actually, I think it is quite fun to see all the variety and variations you can achieve with just ONE pattern! I am a bit disappointed that three brand new makes never made it into the mix. I was especially excited to show off the pants I made. And I expected to wear my newest Coastal Breeze dress (finished MONTHS ago) to a night out… but it only works with bare legs and it has not been bare leg weather (for me anyways). (In fact 2 of those 3 makes are still unworn!) But as I said at the beginning, I LOVE this cooler spring we have been having, and I will get to show off those makes eventually!
I hope you enjoyed this recap! If you have any specific questions about fit/modifications that I did not share or link. Want to know about a fabric I used. Or would simply like to share a comment I would love to hear from you!
Thanks for reading!
Happy June Everyone! It is that time of year again… Me Made May Recap Time that is! Did you participate? My “pledge” this year was basically the same as last year. I wore and documented Me-Mades for everyday I left the house. I actually probably wore me-mades almost everyday since I have a lot of lounge wear and pajama bottoms that are handmade. They are, in fact, some of my favorites in those “genres”!
My post will follow a similar format to last year. I will group my outfits by week (Sun-Sat for full 7 day weeks), note all the patterns and share any thoughts I might have. They are numbered by DATE. I won’t include much in the way of sewing details, but if you have any questions about sizing, alterations, etc. please ask in the comments! I rarely make a pattern exactly as drafted so expect that the majority of these had some sort of tweak. I am only going to link patterns once, so if you see a pattern you like without a link scroll until you find one from another week!
WEEK 1:

May 1: Bento Tee (Heavily Hacked) by Liesel + Co., Not-so-Knotted Tote (Made with my own fabric design, Geometric Cactus Flowers. ) I made my sister a very similar bag using the same fabric which you can read more about in this post.
Thoughts: This was a typical week for me, with the month starting on a Monday, I only had one day out of the house (until Sunday which started week 2). Knowing that I would be going out on the first day of May was exciting since I would kick off the month with an outfit… but I was not feeling well that day which majorly deflated that excitement. But I pulled a (very wrinkled) look together (paired with RTW blazer). This Bento actually has some fun details added (Like the deep side slit in the second photo) but I have never managed to get great photos of it. (I will have to try again). This was also my first attempt at selfies with my new mirror… hadn’t quite found the right place to position it yet.
WEEK 2:

May 6: Coastal Breeze Dress by Make it Perfect, Julia Cardigan by Mouse House Creations, Self-Drafted Infinity Scarf
May 8: Lane Raglan (With an extra giant scoop neck because I had to cut off the first neckband).
May 11: Lane Raglan by Hey June Handmade
Thoughts: It was cooler weather this week (no complaints) so more fall/winter outfits than spring. I think it is amusing looking back that I wore two items that used the same floral fabric. Two lanes too! (But it is one of my most made patterns so that is not surprising).
WEEK 3:

May 13 (A): Lane Raglan, Self-Drafted Mini Cowl (featuring my own fabric designs from the KIKU GARDEN Collection).
May 13 (B): Oslo Cardigan, “Taormina Tee” (Drafted from the Renfrew Top, but majorly changed).
May 14: Bess Top by Imagine Gnats, Blackwood Cardigan by Helen’s Closet
Thoughts: This week featured two “special events”: Mother’s Day Lunch (Hence the second May 13 Outfit, the first I wore to Church earlier in the day) and my husband’s birthday. He took the day off and we went out for lunch at a favorite french restaurant, so I was able to get a mid-week “non-selfie” photo!
WEEK 4:

May 20: Cheyenne Tunic by Hey June Handmade and Oslo Cardigan (See photo at top of the blog post)
May 22: Oslo Cardigan by Seamwork, Hudson Pant by True Bias
May 26: Hadley top by Grainline Studio, Not-so-Knotted Tote
Thoughts: It was actually too cold for the outfit I wore on May 22, but I REALLY wanted to have at least one pair of me-made pants make it into a photo! Ha ha! Anyone else dress for the photo instead of the weather/activity/etc. ?
WEEK 5:

May 27: Chai Tee, Everyday Skirt both by Liesel + Co. I also wore a me-made cardigan (not pictured), either the gray Oslo or the navy Blackwood again… (Can’t remember for sure). I chose not to take a photo with it since the tee was new and I wanted to document it.
May 28: Renfrew Top by Sewaholic, Halifax Hoodie by Hey June Handmade (BLOG POST coming soon!!!)
May 29: Out and About Dress (Peplum Top Hack) by Sew Caroline
May 31: Lane Raglan, Oslo Cardigan
Thoughts: My husband was off this week for a “stay-cation” so there was a lot more out of the house activity than usual! It also got very hot so I was able to wear more of my warmer weather items.
FINAL THOUGHTS:
Overall Me Made May was fun. I love seeing what everyone else is wearing (especially how they style their me-mades). I love my handmade wardrobe and wearing my me-mades all the time already so I don’t really need the motivation. And actually it can be a bit tiring taking all the photos. Plus I feel more pressure to curate my outfits rather than just grab whatever I feel like wearing. But I am happy I did it! It challenged me to style and wear some things I might not have naturally grabbed. I obviously love my Lane Raglans… in fact I have already made another one, in solid purple, since I don’t have a lot of solid short-sleeve me-mades. I also wore my Oslos a lot, but that is no surprise, I am all about layers!
And that’s a wrap! I may or my not choose to participate next year…. or more likely I will participate but might not worry so much about pictures!
Thanks for reading! And again, if you have any questions or just want to say hi! Please leave a comment!
Brenda
![]()
SPECIAL NOTE: Sprout Patterns which is discused in detail in this post is no longer open. I have decided to keep all the Sprout content as part of this post. Unfortunately you will not be able to purchase the product I used. You CAN still get the Lark Tee Pattern from Grainline Studio.
It is time for another installment of “Sewing and Design Meet”. This time I am sharing all about my Pebbles design and what I have made with it. The majority of this post will be focused on the Lark Tee I sewed via a cut-and-sew project I ordered through Spoonflower’s sister site, Sprout Patterns, and I will be speaking a bit about that experience too. At the end I’ll share a quick look at a simple winter accessories set I also made. This post is LONG. If you don’t care about sewing details you can read about the design and then just scroll and look at all the photos 🙂
DESIGN:
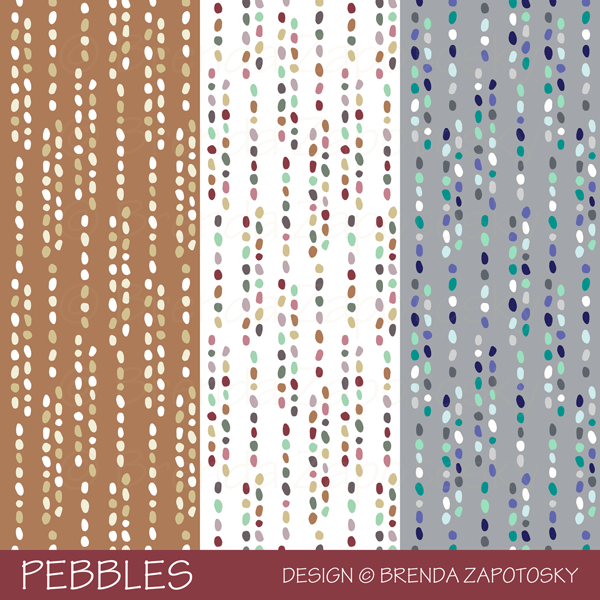
Pebbles is a coordinate I created to go with my Sandcastles design as part of my Beach Bliss Collection. I originally offered this print in 2 different colorways and then added a third one which does not actually color coordinate with the collection because I specifically created it for the winter accessories project.
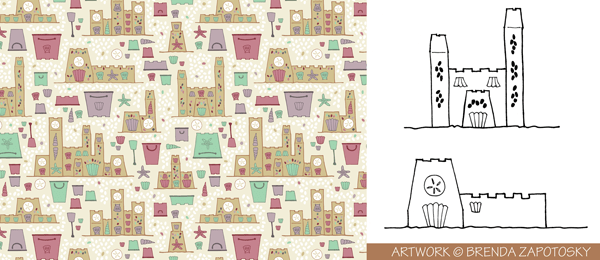
The Sandcastles design was created from hand drawings that I vectorized and turned into a pattern in Illustrator. I included pebble details on the sandcastles and as background infill. To create the Pebbles print I pulled out pebbles from the pattern and arranged them into vertical lines. Below is a look at Sandcastles and some of the original hand drawings. Most often, even if I do a hand drawing first, I completely redraw them in Illustrator, but this time I used auto trace since I wanted to maintain the feel of the hand drawing which I think matches the beach theme well.
FABRIC AND SPROUT PATTERNS:
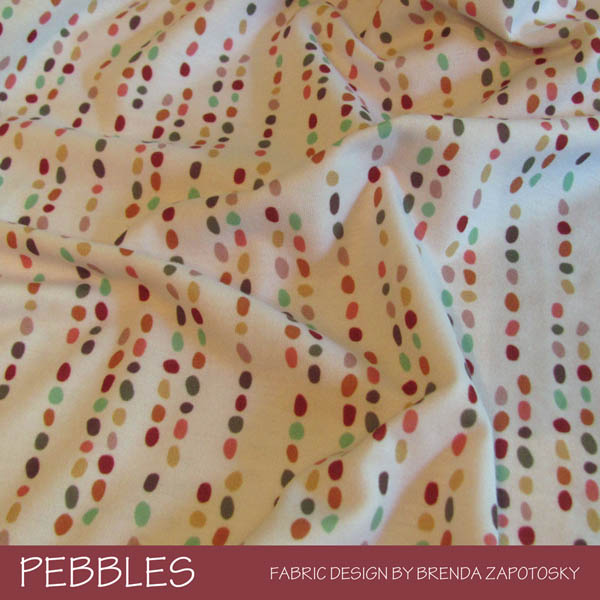
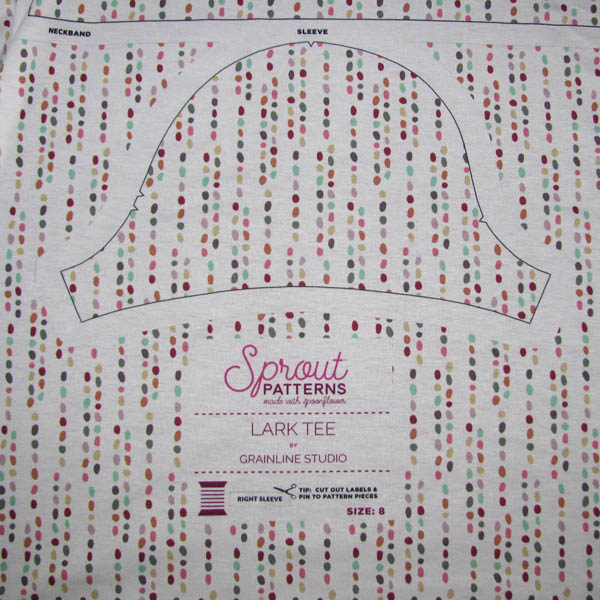
Instead of purchasing “raw” fabric for this project I ordered my fabric AND pattern through Sprout Patterns. If you are not familiar with Sprout they are one of Spoonflower’s sister companies. With Sprout, you can order sewing patterns from a wide range of companies and designers printed directly on the fabric! It is the ultimate, cut-and-sew: all you need to do is cut around the outlines of the pieces and start sewing! With your Sprout purchase you also get a pdf copy of the pattern so you can sew it again in the future and also use the pieces for adjustments, etc. (Which I definitely did). I chose the Multicolored version of my Pebbles design printed on Modern Jersey. Here is a look at a portion of the printed fabric where you can see a pattern piece and how the design continues on the unused fabric:
There are some pro’s and con’s to using Sprout and I think ultimately it will vary person to person on whether this sort of sewing experience is right for you.
PROS:
CON:
One last detail that is VERY important to note is that you MUST follow washing instructions. I learned this the hard way as I shrunk my fabric, which changed the size and proportion of the pattern pieces! I am so used to pre-washing my fabric in a blast of hot water and hot dryer to get the fabric to shrink as much as possible before I sew with it, I was basically on auto-pilot and did the same with this project. BAD IDEA. I was able to make it work, thankfully, but my shirt is a bit shorter as a result. AND I had to cut new sleeves. Thankfully they were the cap style and needed very little fabric and were able to fit on unused portions of the fabric but it is a bummer that I had to do that instead of saving those sections for a future project.
SEWING:

The Lark Tee is a basic tee shirt with a ton of options. For my Sprout project I chose the scoop neck with cap sleeves (but as I mentioned above you get the pdf so you get ALL the views and variations with it and can print it and use it like a regular pattern. I have already made several other versions). I chose Modern Jersey as the fabric option. The sewing is very straightforward so I won’t really go into that, but I do want to talk a little bit about grading the pattern.
I am pear shaped and in this pattern (and pretty much all Grainline top patterns per the SIZE CHART) I am a size 4 bust and my hips sort of hover between size 8 and 10. But with Sprout you can only pick 1 size, so I had to do some creative thinking. I have square shoulders and a wide upper back so I usually like to go up a size (to a 6) for my bust. And since this was a stretchy tee, I figured I would be safe going with the size 8 for my hips. So I ordered a size 8 with plans of using the pdf pattern pieces to grade the top smaller. Of course needing to print and assemble ALL the tee pieces pretty much negated the fast and quick factor of Sprout, but I really wanted to try the whole process once to see how it worked, AND it was still faster having the pieces already outlined on the fabric since it saved me from laying them all out and finding the grain, etc.
As I mentioned above, I unknowingly shrunk my pieces, so when I laid the pattern pieces on the printed fabric things did NOT line up like I expected. The fabric shrunk WAY MORE vertically then it did horizontally… so they weren’t smaller everywhere, more like squashed. In the end it was almost good that I was grading it smaller, because I was able to fix this with my adjustments. It did mean however, that the top got shorter. AND, the size 6 sleeve piece did not fit within the outline. Thankfully, there was enough extra fabric elsewhere to trace the sleeves. After that was all worked out the sewing was easy! Especially since I sewed it twice with other fabrics prior to cutting into the good stuff.

Overall I am very happy with the fit of this tee. I LOVE the size of the scoop neck! It is basically my “dream scoop”. The sleeves are maybe a tad snug for cap sleeves and I would like the tee to be an inch longer (but that was the fault of the shrinkage). I absolutely LOVE the Pebbles design as a tee, but the white background version might not have been the wisest choice. (Thankfully I ALWAYS wear a tank top under everything). I also do not love it in Modern Jersey and wish I would have chosen the Cotton Spandex instead. I have sewn a TON of things with Modern Jersey, I love the fabric, but for a tee shirt… it is just not breathable enough for my tastes. But this is totally personal preference. I am a natural fibers gal.

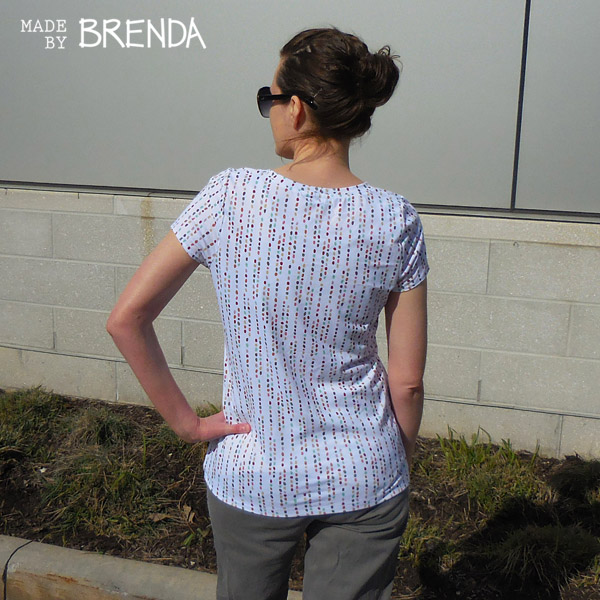
*** You might have noticed a pants change in these photos… I actually took photos on multiple occassions (months apart!) and locations. I actually finished this top last year! The blog post was so delayed I had a chance to take another round!
As stated at the start of this blog post, Sprout Patterns is no longer open. You can still make your own! You can buy the Lark Tee Pattern from Grainline Studio directly. It is also available as a paper pattern. And the Pebbles design on Spoonflower seperately.
PROJECT #2: Neck and Ear Warmer Matching Set

Technically this Project #1 since I made this well before the tee shirt but the blog post flows better to have it at the end. Using the Drizzle colorway of the Pebbles design, printed again on Modern Jersey, I made a matching fleece-backed ear and neck warm set. Both of these are self-drafted. I love the fit of the ear warmer but I think I would tweak the neck warmer proportions should I make it again. And I would not use the Modern Jersey again. While I do love it for infinity scarfs, in this application where I backed it with fleece, a fabric with more structure like cotton spandex works better. I have made several ear warmers and the ones that used cotton spandex are much smoother against the fleece.
That’s it! You made it to the end! Woop! I actually have made one other item with some of Sprout leftovers, a headband, but I don’t have a good photo to share. (And still have pieces left I could use as accents on a future project too!) I think I covered everything, but feel free to ask any questions or just say hello in the comments.
Thanks for reading!
Brenda
Today I am back with the second installment of my Handmade Christmas Gifts 2017 Recap! If you missed it, you might want to start with Part 1 as it gives some general context, etc.
The projects I am sharing this round are mostly apparel but there is one fun/silly non-clothing item bonus project at the end! But first…
RAGLAN TOP AND COORDINATING MINI-COWL NECK SCARF:
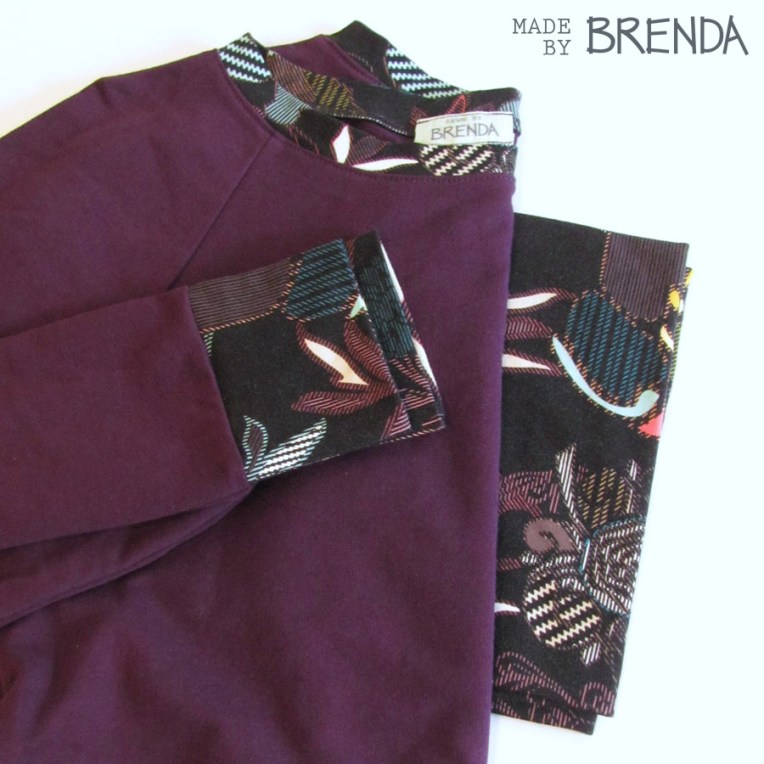
I sewed up this combo for my mom, who is one of my biggest fans and is always so appreciative of the items I make for her. She is a pleasure to sew for and thus I have made her many items over the past few years. She has a lot of Brenda-Made clothing that was either made specifically for her or was an item that didn’t work for me. So for her gift I wanted to make her something from a “new to her” pattern. I have sewn up the Bethioua Raglan top once before for myself and my mom loves it so I thought it was a great choice for her gift. For the main fabric I chose this awesome Eggplant French Terry from Raspberry Creek Fabrics. I love this “line” of french terry fabrics that Raspberry Creek carries because they are a cotton/spandex blend! And jewel-tones are a good color on my mom.
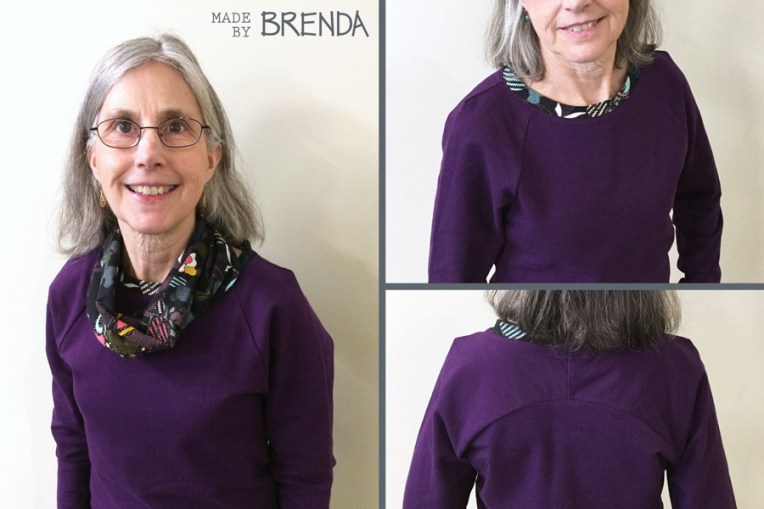
Originally I planned on using some charcoal gray cotton spandex for the cuffs and collar but I had a scrap of this AGF knit (from the Etno Collection, can’t remember the design name) sitting on my table when I was working on this and they looked so perfect together I decided to use it instead. I like how it adds a really special and unique touch to the sweatshirt. AND, after I cut the shirt pieces I had a perfectly sized piece left to make a mini-cowl!!! Bonus Gift! I just love how it pairs with the shirt.
The Pattern: I have sort of mixed feelings about this pattern. The Bethioua Raglan (which I purchased from Indie Sew) is a a fun one, since it has some special details that set it apart from other raglan tops, including subtle bat wing sleeves and really awesome curved back seams where the sleeves attach (instead of the usual angled raglan connection). Both big pluses. It also has shoulder darts… which is a minus for me. I have made this pattern twice now, and I am just not sold on them. I am not sure if I am not sewing them correctly… since on other examples I have seen they do not stick up like they do on mine. Or if they are more pronounced when using heavier fabric. Or they need to fit just right to look good. But I am not loving them. (In fact I am now wary of trying any other design that has shoulder darts!) If I make this pattern again, I am going to try to eliminate them by modifying the pattern piece. I also have an issue with the sleeve cuffs. I think the size the pattern instructs you to cut (there is no pattern piece) is definitely too skinny. There are actually 2 size options close-fitting and over-sized. But even the bigger sized ones are too small. This is a super easy modification but I did want to point it out so if you are making the pattern you can consider cutting them bigger from the get-go. You might want to taper the sleeve bottoms a bit wider to match (although I did not). As a reference, I have SUPER skinny wrists and small hands… and they are definitely too tight for me.
My mom was just commenting this weekend about how much she loves this top and how in the french terry it is like wearing pajamas out and about! I am considering this gift a TOTAL WIN!
MOMMY AND ME RAGLANS
Next up is a pair of coordinating raglans I made for my sister-in-law and niece.
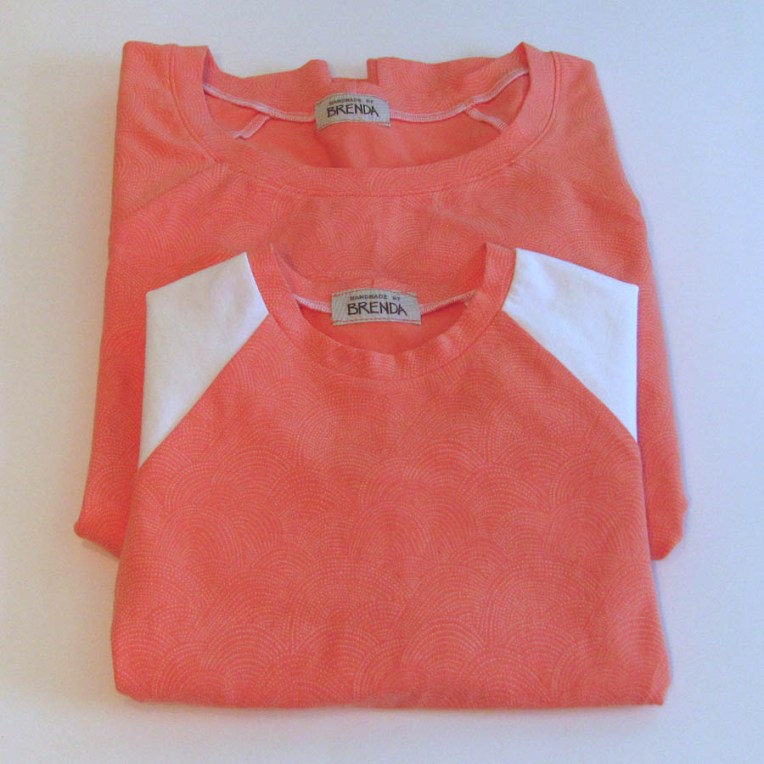
I was assigned my sister-in-law Julie for our Christmas gift exchange and I had her show me some of the patterns I have made myself that she would like also. Then I picked from there. I chose one of my most TNT (Tried and true) patterns, the Lane Raglan by Hey June Handmade!
For the fabric I chose this gorgeous Dear Stella knit. It was my first time sewing with a Dear Stella fabric and I was super impressed with the quality. I especially loved that the fabric was the coral color all the way thru with just the scallops being the printing (instead of it have a white back like a lot of printed knits.) I purchased it through Hawthorne Threads (and I wanted to give them a shout out because I am a big fan of their store) but it is no longer available there. You can however find it here. This was a pretty straight forward sew. I did cuffed 3/4 sleeves, so I did do a custom sleeve length/cuff combo for that.
When I purchased fabric for the Lane I bought a little more than I needed for long sleeves, totally forgetting that Julie said she preferred 3/4 or short sleeves… So I knew I was definitely going to have extra fabric leftover and I thought it would be super adorable to make my niece a top to match her mom’s! Using the size I thought I needed to make, it turned out that I did NOT have enough to make an entire long-sleeved top from the leftovers. Believe me, I TRIED! Multiple patterns and pattern hacks were tested. I needed to bring in another fabric and this solid white scrap from stash was the best matching fabric I had. And even with that scrap the Raglan Sweatshirt pattern I chose (from Brindille and Twig) still BARELY fit! Basically I cut one piece at a time starting from biggest to smallest, maximizing the scraps and barely fitting every piece (except maybe the cuffs)! In fact, the sleeves did not fit fully, I had to shorten those and use extra tall cuffs to make up the difference. I used my puzzle solving skills to the max on this one!!!

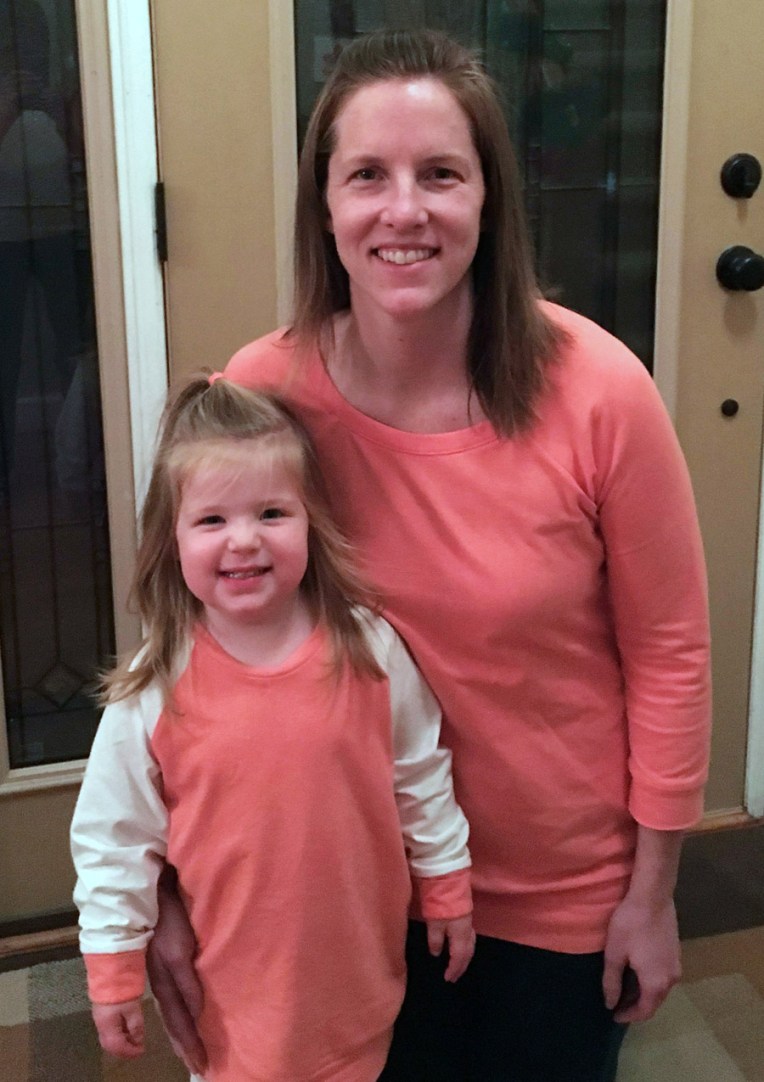
AND THEN… it turns out… the shirt is WAY TOO BIG ON HER!!!!!!!!!!! Wah, wah! Oh well. I’d rather have it too big, because it will fit eventually… but I did long sleeves on purpose so she could wear it now. Not sure a size smaller would have fit on just the Dear Stella fabric anyways. So… it is more like a dress. But I think she likes it, because she has special requested to wear it! 🙂
My plans for nice modeled photos fell thru, twice, but Julie got some photos of them together and I found one that was pretty good. (Bad lighting so not super clear, but gives you a sense of fit). I still think they look pretty cute together, even if my niece is swimming in hers!
BONUS PROJECT: FLEECE AND FELT SPOON SLEEVE
This super quick little project was a bonus gift for my 2 1/2 year old nephew. He LOVES cooking! And he loves REAL cooking tools. So as a fun little gift I decided to give him his very one “big person” spoon for all his play cooking. To jazz it up a gift I thought a special holder for it would be fun. This was created entirely with scraps and entirely on the fly. I just kind of made it up as I went. The navy is fleece and the orange is a piece of leftover felt from another gift I made my nephew for his first birthday! (You can see what that was and read all about it in this post).
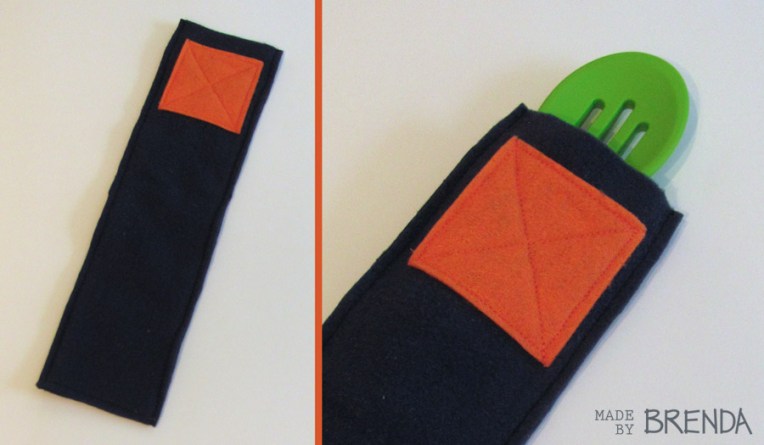
The spoon does fit inside completly, I just thought it would be cute to take of photo of it popping out a little!
AND… That’s a wrap! Phew! I am finding these blog posts that cover a lot of projects to be a great deal of work! I hope you enjoyed reading them! (Because then the work is worth it!) It is also my 5th blog post this month! Wow! I definitely won’t be this prolific all year long. But I already have my plan for my next blog post and hope to be posting more regularly throughout the year!
Thanks for Reading!
Brenda

Today I am excited to finally start sharing with you all the gifts I made for this past Christmas. I think it is fun to do a post like this, not only to share sewing details, but also to perhaps inspire ideas for handmade gifts. If you want even more inspiration you can read my Handmade Christmas Gifts 2016 post! I am finding there are A LOT of details to share, so I have decided to break it up into a PART 1 and PART 2 so that the posts are not overwhelmingly long. Today I will focus of the gifts I made using my own fabric designs, since that always adds an extra layer of information.
It is a tough business sewing for Christmas: deadline looming, personal projects get delayed or on hold, and you have to keep a lot of secrets! (really tough for me when I am excited about a make). Learning a lesson from past years, I started REALLY EARLY this year and yet, somehow STILL found myself down to the wire. In my defense, I added a few gifts not originally planned AND lost some sewing time I expected to have. So I was still sewing on Dec. 23!!! But I got it all done and everything was well received!
NAPKINS AND TRIVETS

First up is a set of cloth napkins and matching trivets I made with one of my own fabric designs: Picnic (Sunny). This is actually the newest colorway for this design and I created it specifically with this project in mind. I chose this print because I think it is a modern take on both plaid and check and perfect for a kitchen. The colors were picked to match the recipients’ dinnerware. I really love how this palette turned out and might need to look into offering all the designs in the Flutter Collection in this new colorway. I ordered 1 yard printed on Spoonflower’s organic cotton sateen.
Since this print has a natural cutting point built in, I let the white space breaks in the pattern squares determine my size options for the napkins. Ultimately I decided to make 8 out of the yard I had. They turned out a little small… but not unusable, just smaller than you would expect. (Perhaps I could have made a smaller hem). This was my first time sewing mitered corners. 32 mitered corners! Yeah. That got old pretty quick. I found this tutorial from Colette very helpful. I did the sewn and topstitched version. Below is a zoomed in look at the corners as well as a “styled” photo with silverware.

I had a good sized strip of fabric leftover so I decided to make a few trivets to go along with the set. I went with a slight rectangle instead of square for two reasons: 1. I thought they would be a bit more practical for oblong and rectangle serving dishes and 2. The fabric shrunk more in one direction than the other, so even if I cut it an equal number of design pattern squares wide and long they would not be square. (In fact the napkins are not exact squares for this very reason.) I backed the trivets in a light yellow quilting cotton.

KIDDO HATS

These are created from the FREE pattern for the Blizzard Bonnet by sweetkm. It didn’t take long after seeing this project to know that I wanted to make them for my niece and nephew. They are both 2 1/2 yrs old, born just 3 weeks apart. It is hard to resist making them something matching and I thought this little hat was so adorable! Like a little Gnome hat. In hindsight, maybe I should not have gotten caught up in the cuteness so much, as I am not sure how much they will actually wear these. (Although my niece did request to wear it at a birthday celebration! Ha Ha Ha! It is a party hat!)
They were surprisingly fun to sew up. Even the bias binding, which I usually loathe, sewed up so well! I think because it is sewn twice, instead of just sandwiching over it the edge, which made it “ok” to miss the back side edge in places as it was already sewn down. I actually changed the sewing of the bias tape from the directions. I first sewed it to the INSIDE of the hat and then flipped it to the outside. And I edge stitched on the front instead of stitching in the ditch. Aside from that, the only other change I made was to lengthen the ties. I do want to note that SIZING was a conundrum for me. The toddler size, which is what I consider a 2 1/2 year old to be, look super small to me. (I sewed up a quick tester with a scrap of fleece.) I ended up making the small child size and it is perfect. (My mom did do a stealth head measure of my niece for me.)


I used my own fabric design for this project as well. I actually created a brand new design: Checkered Christmas, to coordinate with my Classic Christmas Collection. I ordered 1 fat quarter of both the Festive and Merry colorways on the Lightweight Cotton Twill. After getting my fat quarters I decided to tweak design a little, so the designs as listed are slightly different than what can be seen on the hats (Same overall look and colors, just in different places). I used white fleece to line them and Jungle Green bias tape (by Wrights) for all the finishing (That color is a very good match to this print). Even in the second largest size, thanks to wider width of the fabric, I have a lot of this twill leftover for a future project.
I am ending with two ADORABLE photos of my nephew and niece “modelling” their hats! Shout out to my brother-in-law Jacob (of The Traveling Photo Booth) for taking these great photos and to my sister Deanna (of DLynn Design) for using her AMAZING Photoshop skills to crop out all the Christmas chaos in these photos!

If I left out a detail you would like to know about please ask in the comments! And stay tuned for PART 2!!!
Thanks for reading,
Brenda
Hi folks! I am here today to share my most ambitious sewing project to date. And while it is not perfect, I still consider it to be a HUGE SUCCESS. I present for your reading/viewing pleasure… the Cheyenne Tunic by Hey June Patterns.
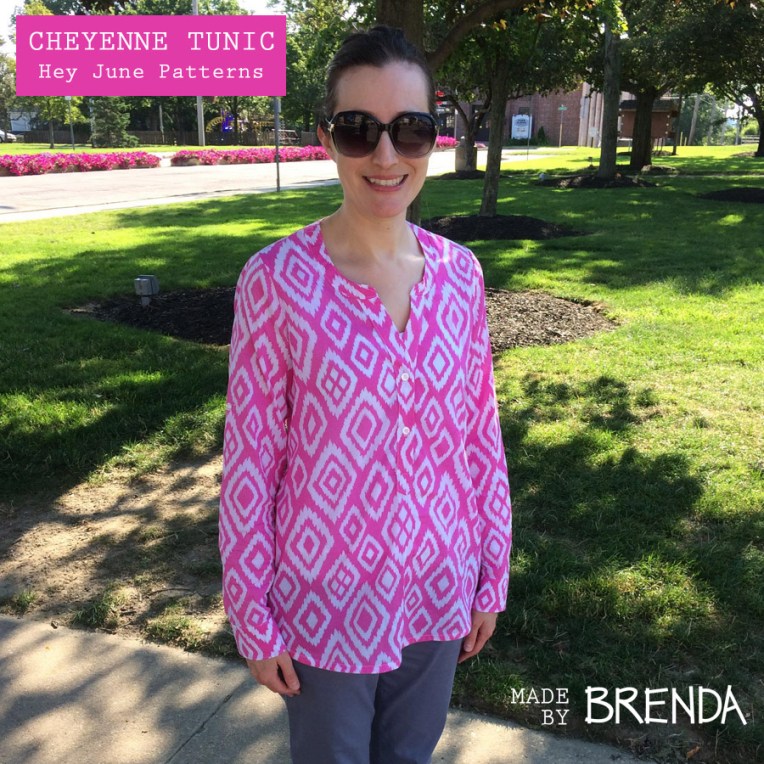
This is the third pattern I have sewn up from Hey June and I have to say that I am continually impressed by the quality and detail of both the patterns and instructions. In fact, besides loving the popover view with the non-traditional partial placket, a huge reason for me picking this particular blouse as my first official button-down project was because it was designed by Adrianna of Hey June. Having sewn many, many patterns by Indie sewing pattern designers, I can say that while MOST have been good, there have been disappointments along the way. But Hey June is a tried and true brand for me so I knew it was a safe bet for my dip into the next level of sewing. Plus it gets great reviews! Adrianna’s instructions and illustrations are top-notch. She also has an online photo-tutorial sew-along. Normally I am an illustrations over photos gal, but for some of the techniques I found having both very helpful!
Since I had not done many of the skills included in this pattern I decided to make a full practice version of the top instead of just a quick fit muslin. I found this very lightweight cotton at Joann’s for a MEGA bargain after all the discounts and coupons were applied. I did not bother with pattern alignment. The design is not symmetrical even though it might appear that way in places. It is only on the back yoke where it might look like I tried but failed to pattern match.
This pattern comes with A LOT of options, most of them interchangeable (making it a really great value too!). I chose the View B placket/collar, tunic length, long sleeves with roll up tabs and no pockets (This fabric is WAY to busy for pockets). Even though these were my first button plackets (and first time using the button/buttonhole feature of my sewing machine) I found that it was the COLLAR that actually gave me the most difficulty. It is a little wonky, especially at the front tips, but not super noticeable when it is on.
I made the pattern mostly as written (a rarity for me), adding a little extra top-stitching since I prefer it all the way around the plackets instead of up just one side. I didn’t do this until the sleeve plackets and decided it was too difficult to add after the fact to the front center. Next time I will do that everywhere.
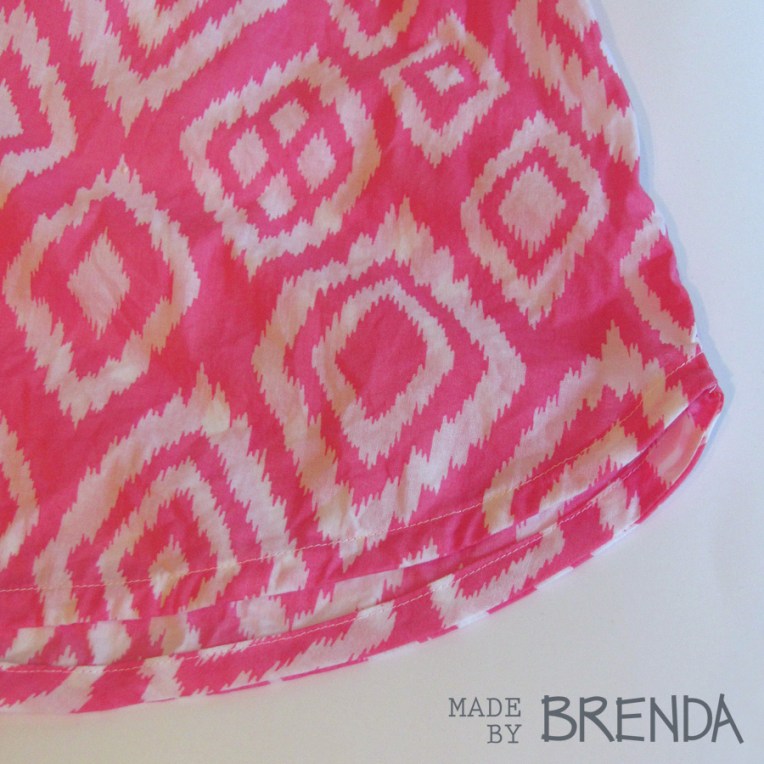
My other change was to use self-fabric bias tape for hemming the bottom. I find I have more success hemming curves this way and after struggling with the curves of the collar I definitely preferred to use the bias for the bottom!
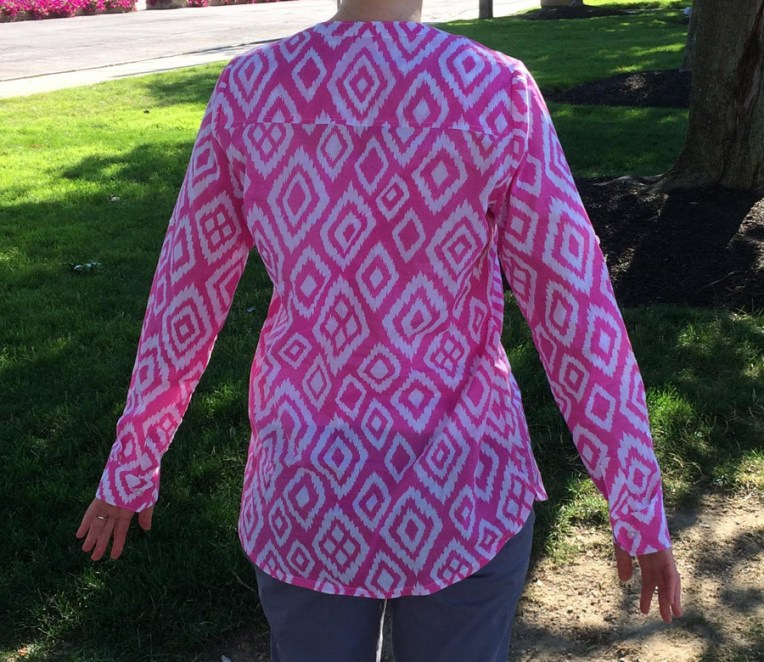
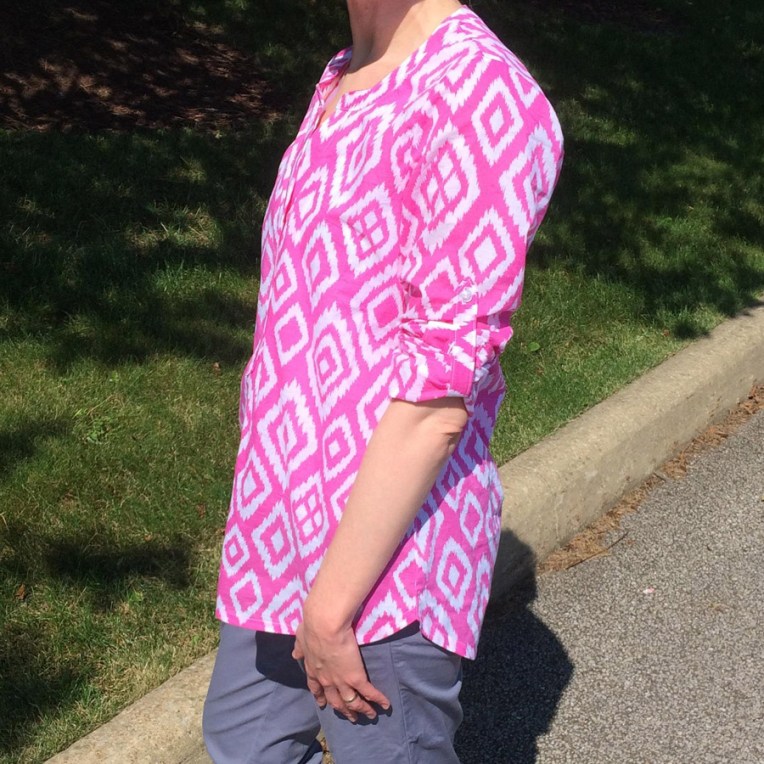
FIT: So this is technically my muslin for this pattern and after all the work I put into it, I am very thankful that it fits well enough to be wearable. I do, however, plan on making some changes for the next one. For reference, my measurements put me in a size Small for the bust and size Large for my hips (Pear shaped gal here.) Based on the finished garment measurements I felt that I could get away with only grading to size Medium on bottom and still have enough ease. And I do. But I would like a little bit more. And since one of the perks of sewing your own clothes is getting garments tailored to your body, I am tweaking my next one to hopefully be my perfect fit. I actually just finished creating new pattern pieces for my changes today. The fit of the front of the tunic is good but I do want more width for my hips so I am adding width to the back only in two ways/places: A tiny bit through the neck and yoke (I have wider shoulders and this will give me just a bit more room across my upper back) and then a lot more width though the back main piece. I plan on creating a pleat in the top center where it attaches to the yoke (a common detail on button-down shirts). The other change I am making is to NARROW the sleeves! Yes, I am making the shirt larger on one end and skinnier on another! I have skinny arms (apparently skinnier than average) and a “skinny arm adjustment” has been a common alteration for me since I started making clothes. On this version, the sleeves have been riding up my arm as I wear it and bunch up near my elbow (I do not even need to unbutton the cuff to put it on). So I am tapering the sleeves to an extra small on my next one. I have high hopes that these two changes will get me to my perfect top!
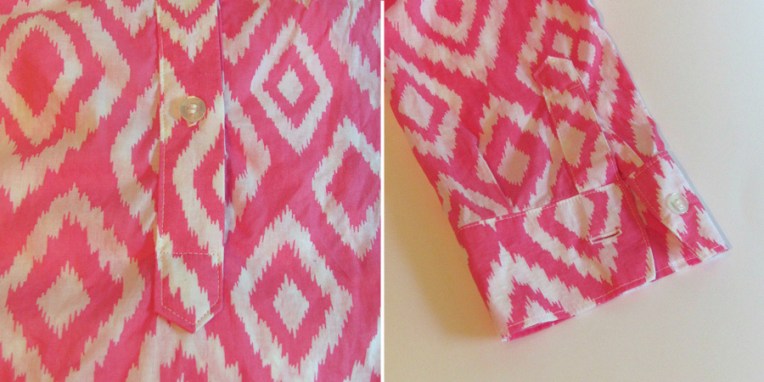
Buttons and Buttonholes: As I mentioned this was the first time doing these on my machine and I was extremely happy with how it handled them. The apparatus for making the buttonholes is not the sturdiest but it gets the job done. My only complaint is that it does not seem to be consistent on where it starts the hole and thus it is a bit unpredictable where the finished hole will be positioned. This is not a big deal for solo buttons or even pairs (like on the placket). But would be if I had done a full placket. Other than that, NOT SCARY!
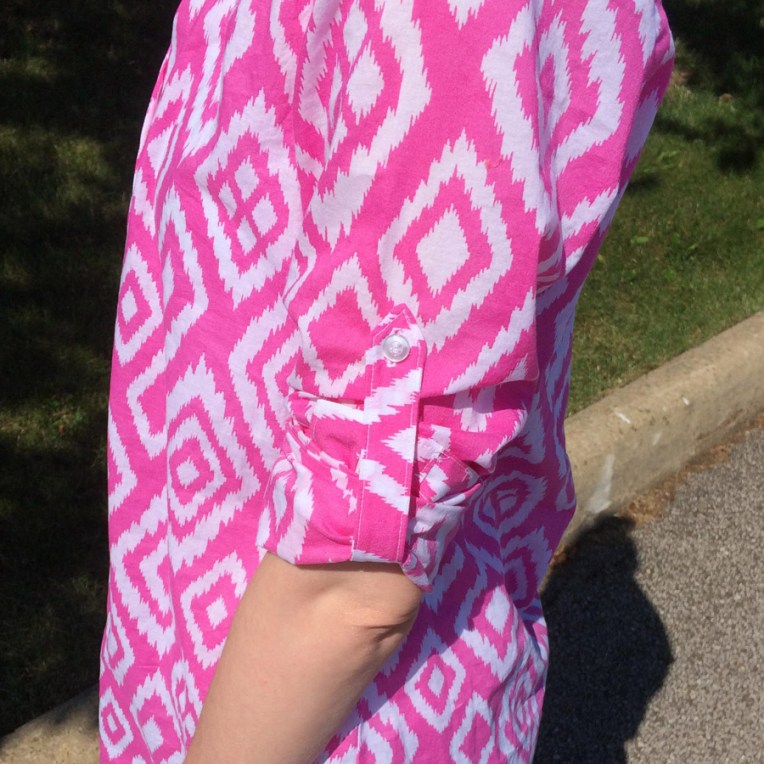
Here is a close up of one the special details of this top, the sleeve tab! I picked long sleeves for the first one but it easily converts to elbow sleeves simply by rolling up and securing with the tab! You might notice that the buttonhole is slightly too close to the tip. This is one of those locations where the buttonhole did not start/stop where I expected it to. Otherwise, I think it looks pretty great!
Overall, I would say that this top was a pleasure to sew! There are a lot of pieces to cut. And a lot of steps. It took me quite a long time to complete. But it was so satisfying! And the end results, even with my imperfections here and there, look so professional! Whether you have never made a button-down shirt or are an old pro, I highly recommend this pattern! I very excited about my next one!
As always, thanks for reading!
Brenda
It is June! Which means that Me-Made-May has come to a close. For those who don’t know, Me-Made-May is a month long event where sewists from around the WORLD pledge to wear their handmade clothes regularly all month long! Most wear them every day of the month. If you follow me on Instagram you already know that I participated in Me-Made-May (For the first time!) this year. Now that the month is complete, I thought it would be interesting to do a recap of all the outfits I documented (some of them never before posted) and share my thoughts on the experience. I did not pledge to wear me-mades everyday since I work from home and there are many days I don’t leave the house. Honestly, though, even most of those days I did end up wearing me-made either as lounge wear or pajamas (or both) but I did not take photos. May was, however, an unusually busy month for me, between birthday celebrations, family visiting from out of town, and my husband being home for a staycation for the last few days of the month, and I ended up being out and about way more than usual which gave me a lot of opportunities to dress in handmade. We had quite cool weather for a good part of the month which really stretched my options. In fact, if I had planned better I would never even have repeated an outfit! (more on that later). For sharing purposes I am posting my documented outfits by week (Sunday thru Saturday), with a list of the garments I wore. Most if not all of my garments have been altered from the pattern at least a little (it is rare that I make a straight size of anything) and in some cases A LOT. This post will get WAY too long if I share all my modifications but if you see a garment you like and want to know how much I altered it I encourage you to leave a question in the comments and I will be happy to share details!
Ok… On to the good stuff!
WEEK 1:
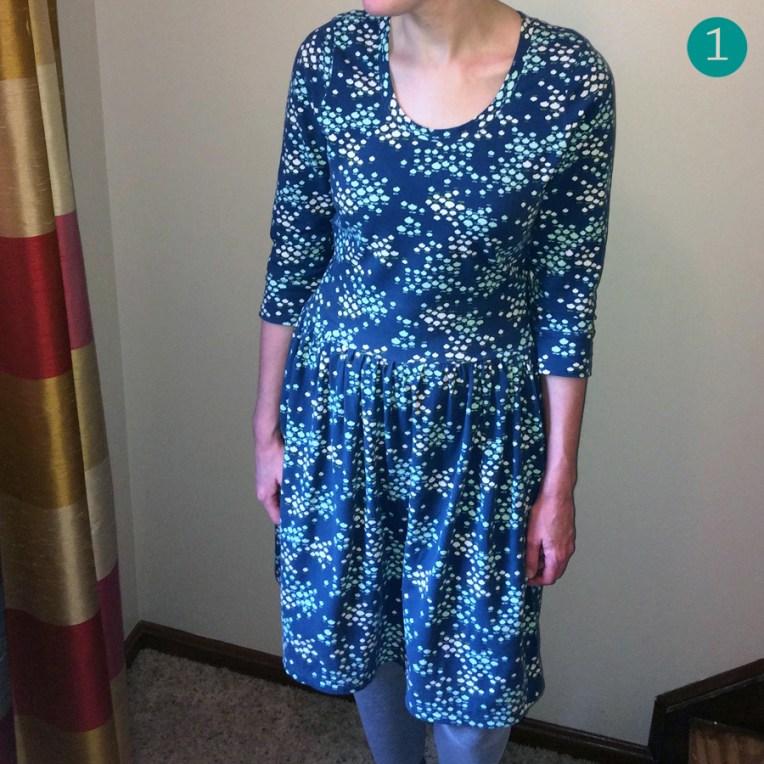
1. May 6: Out and About Dress by Sew Caroline in Buttercup Drops by Amy Sinibaldi, an AGF knit I got for my birthday! (Sorry for the poor quality photo, it was raining this day and there isn’t a great place to take photos inside my house).
This was my only repeat during the month and if I had planned better I would not have had to repeat at all. I wore this dress to sing for a First Communion. In hindsight, I wish I picked a different handmade dress since it was my sister who gave me this fabric and she came to visit from out of town later in May so I wore it again when she was here. Not a big loss though since, thanks to my modifications, this dress fits me super well and is super comfortable. And I was able to get a much better picture when I wore it the second time (it was raining this day).
WEEK 2:
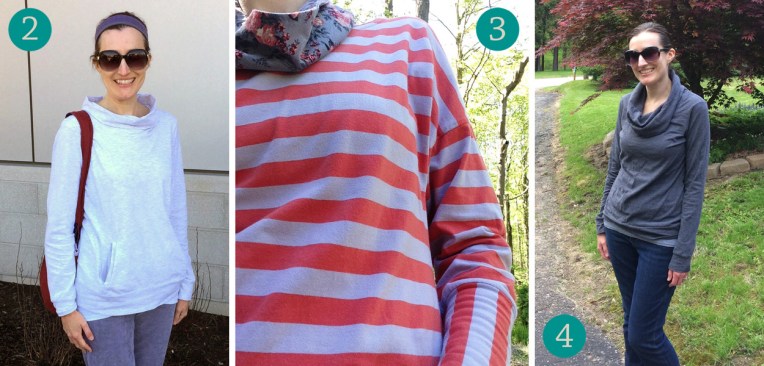
2. May 7: Jasper Sweater by Paprika Patterns in this awesome Ivory Heather Fabric.
3. May 9: Flower Stripe Top and self-drafted mini-cowl.
4. May 13: Cowl neck Renfrew Top by Sewaholic Patterns in Heather Pepper Jersey from the RK Laguna line which I LOVE.
WEEK 3:
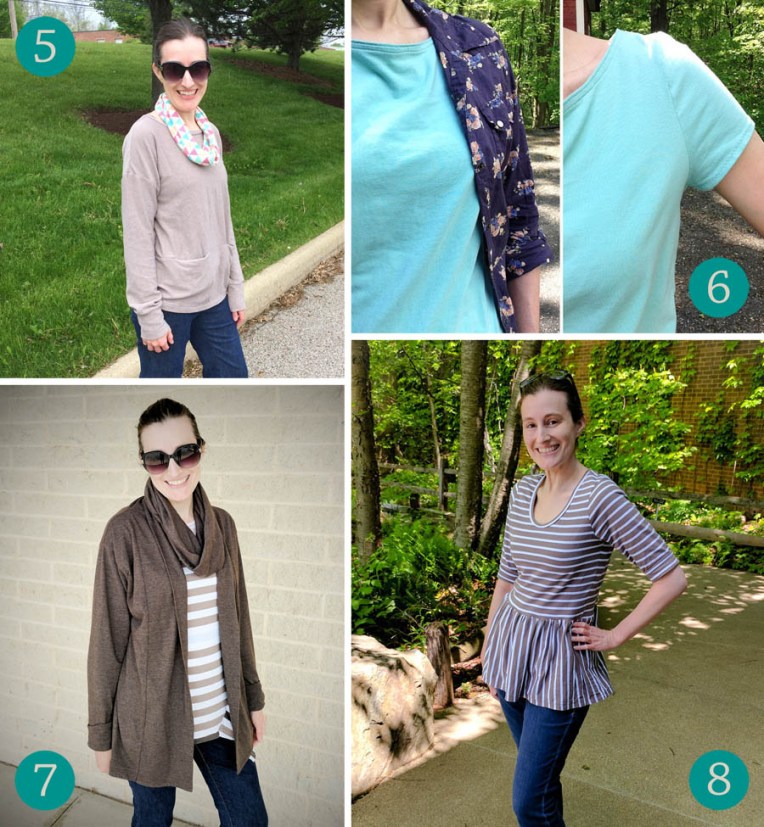
5. May 14: Bento Tee by Liesl & Co. in a Brushed Knit Blend from Cali Fabrics. Worn with a self drafted mini-cowl using my own fabric design: Party Triangles printed on modern jersey fabric by Spoonflower.
6. May 18: Lark Tee by Grainline Studio paired with a RTW Blouse. Obvious selfie photos. For the right photo, I was trying to show the armpit fit as I would like to have that portion fit a little closer. This is my first Lark and I think I will size down on top for the next one. I actually purchased this pattern via Sprout Patterns printed with one of my fabric designs and I couldn’t grade between sizes like I normally would. So I sewed up a sample of the straight 8 to test the fit. I think I can grade the top smaller, even on the pre-printed fabric so I will try another practice one like that.
7. May 19: Oslo Cardigan by Seamwork in this awesome Chocolate Heather Jersey from Cali Fabrics. This fabric almost looks like wool and has a lovely drape! Worn with an infinity scarf made from the same fabric.
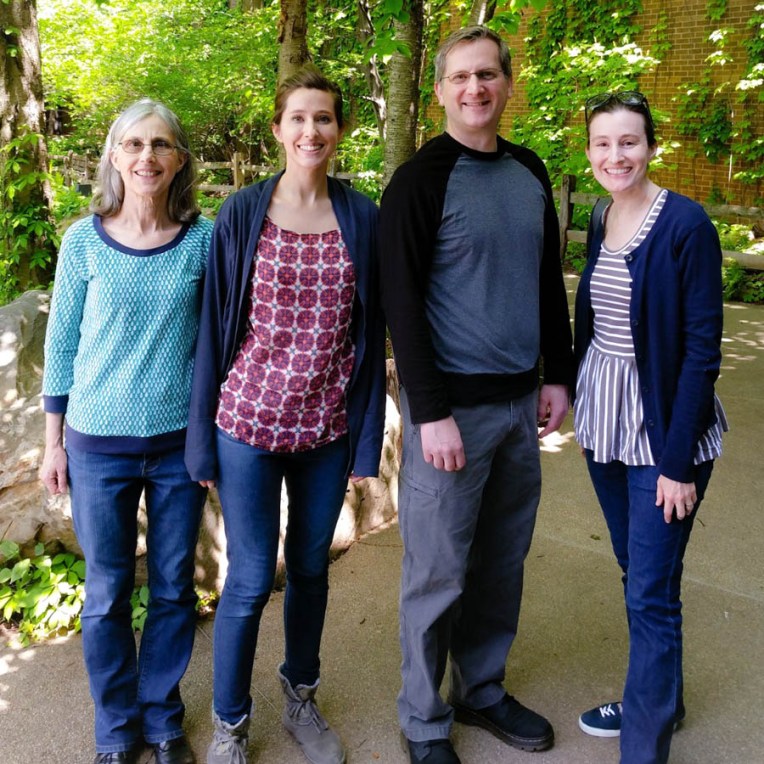
8. May 20: Another Out and About Dress, peplum top version. This was actually my wearable muslin for the dress. I made some bodice changes for the dress version, but as top I kind of like this fit!
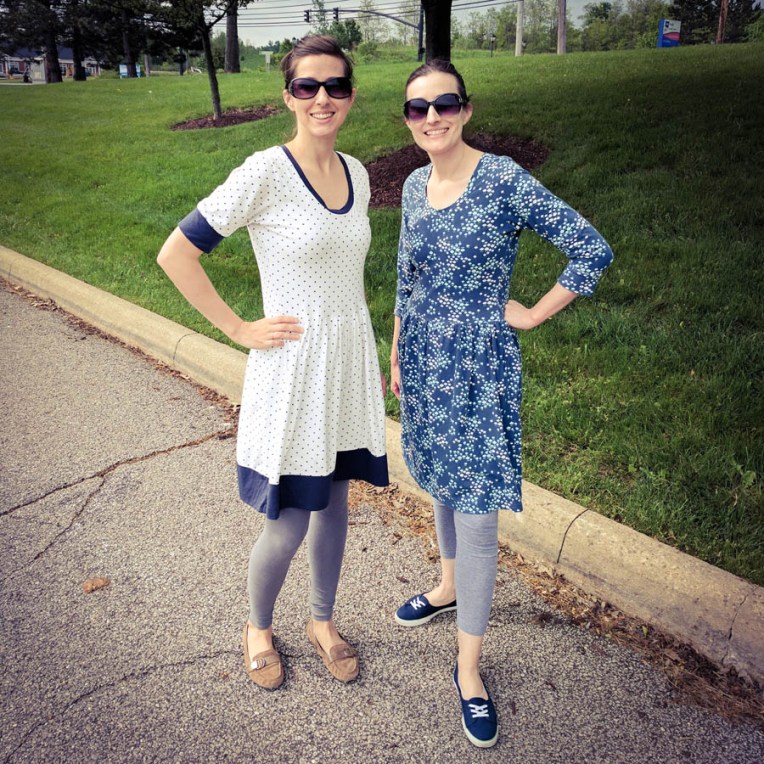
May 20th was actually a family outing day to the Cleveland Museum of Natural History and we were a handmade wearing FAMILY that day. My mom, sister, husband and I all wore handmade!
WEEK 4:

9. May 21: Repeat Outfit! Out and About dress. I actually wore 2 different outfits out in the world this day. The second included the Primrose Peplum but I never got a photo of it.
10. May 22: Lane Raglan by Hey June Patterns in Shore Remains by Pat Bravo, another AGF knit. I quite liked my whole outfit that day! Everything else is RTW. I did wear this top on April 30 and shared it as a PRE Me-Made-May since I knew I wouldn’t officially start until well into the month, but since it was April when I wore it, it is not technically a repeat!
11. May 26: Another Lane Raglan. I call this one my Sunset Stripe Lane. I think the neckband on this one is a tad too big but there is no way I am redoing it since the body fabric is too thin to risk the unpicking. This was made very early on in my handmade wardrobe endeavors. Paired here under a RTW knit blazer I love. You can see a full look at the top here.
Wanted to share one other photo from this week. It is of my sister and I BOTH wearing Out and About dresses! We are long-distance sewing buddies so it was really fun to have her in town and get to see each other’s makes in person! Her version is her wearable muslin.
WEEK 5:
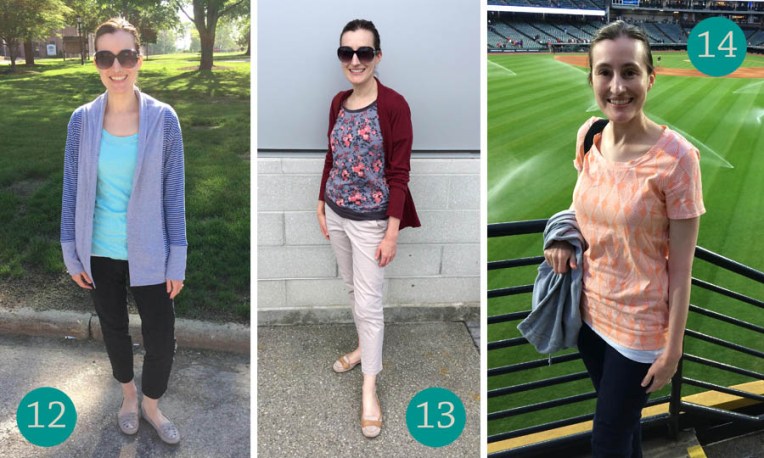
12. May 28: Oslo Cardigan by Seamwork. My newly finished second one, that is heavily modified to achieve a better fit compared to the first.
13. May 30: Another Renfrew Top by Sewaholic, this time short sleeved with a scoop neck. Paired with one of my favorite RTW summer cardigans.
14. May 31: Renfrew Top, again, in another AGF knit. This design is Plumage by Bonnie Christine. No longer available where I purchased it (On sale!), but you can find it here.
Wow! 14 documented days! I hope all this info is useful to someone 🙂 If you want to read a little bit more about the days activities, more garment details, etc. I often shared more those on my Instagram posts.
FINAL THOUGHTS:
I guess that’s it! I hope you made it to the end of this LONG post and are still reading to see this! If you aren’t a sewist, I hope that maybe this post inspired you to consider jumping into the world of handmade clothes! And if you want to learn more about Me-Made-May, Spoonflower had a lovely blog post interviewing the gal who created it!
Thanks for reading!
Brenda
