
![]()
It is time for another edition of Sewing and Design Meet! This time I am sharing about my Transit Lines design and the tote bag I made with it. This design is part of the City Collection which can be found in my Spoonflower shop.
DESIGN:

When putting together a new collection I don’t often sit down and sketch out ideas for coordinates but for CITY I actually did. My original idea for the Transit Lines design was to have criss-crossing lines going in many directions, similar to a subway map. However, as I started drawing it in Illustrator I really loved the look of just the horizontal lines with the thickened bars and decided to take it in that direction instead. I love how the pattern is a versatile stripe and yet, when paired with its title, can easily (I think) invoke images of the city site that inspired it. Whether you interpret the thick bars as trains or stations is up to you! I also really love the color palette I decided on for this print: mostly neutral but with pops of color.
FABRIC:

A few years ago Spoonflower had an awesome and rare 50% off sale on Eco Canvas and I ordered a couple of yards. One yard I divided into (2) 1/2 yard pieces with the intention to make a tote bag with each of them, although at the time I did not have a specific pattern picked out. I ended up choosing free tote patterns from Purl Soho for both of the totes. I have a previous blog post about the first one I made, the Railroad Tote, and some zipper pouches I made with the extras. I chose the Everyday Tote for the Transit lines design as I thought the more horizontal shape would suit it well.
The Eco Canvas has pluses and minuses for me personally. On the plus side: It washes and sews well and colors are bright and vibran. On the minus side: It is much softer and drapier than other canvases which is something I do not like. But I think this is really just a personal preference. I gave the Railroad Tote to my mom and she loves that soft quality. When making the zipper pouches I decided to interface the Eco Canvas portions and I was much happier with the structure. So for the Everyday Tote I knew I wanted to interface those pieces. I needed to do some construction changes to accommodate this (Along with a bunch of other construction changes) which I detail below.
SEWING:
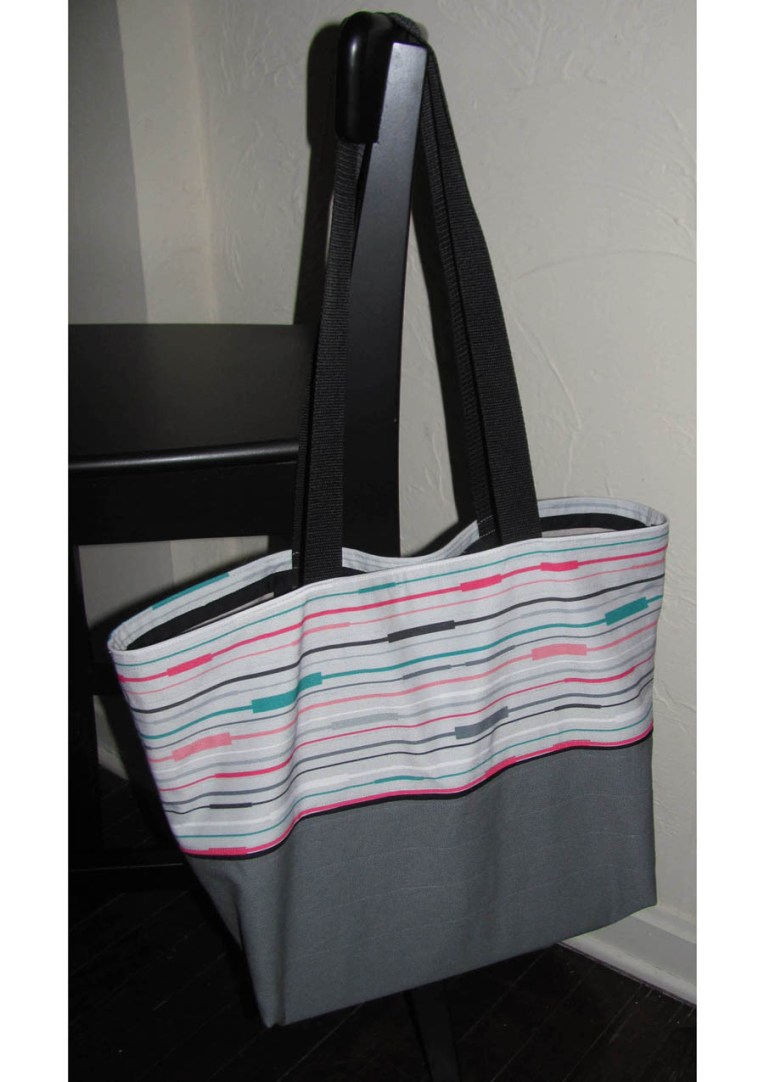
There were a lot of steps to making this bag, including some extra ones that came along with my changes, but otherwise it was straight forward and easy to sew. I didn’t take a lot of in-progress photos (my sewing space is not photo friendly) and it was difficult to get a good overall look of the bag. Here is the best one:
As mentioned above, I made several construction changes when sewing up this bag. I knew I wanted to interface the Eco Canvas pieces and since the bag isn’t lined, I needed to underline at least those portions so that the interfacing was not exposed. After contemplating solutions for this, I decided to also change how the bag panels were sewn. Per the instructions, you cut two full side pieces from what eventually becomes the “upper” fabric, and then cut bottom panels of the “lower” fabric which go over top the first fabric on just the bottom portion. There are some good reasons to sew the bag this way. It ensures you aren’t relying on a horizontal seam to hold the top and bottom half of the bag together and it creates a nice double layer for the bag base. But, it meant that 1/2 of my good patterned fabric was going to be covered which I wasn’t crazy about. So, I decided to instead cut both pieces at half height and let the seam where the bias “piping” detail is connect them together. Since the bag side pieces were already cut, I chose to cut one in half height wise and that determined the height of my bag (and preserved a nice FQ sized piece of the Transit Lines for a future project!). I sewed the top and bottom halves together with the accent bias “piping” in between. I then UNDERLINED the entire height of the bag sides with a coordinating quilting cotton that I had leftover from the previous Eco Canvas projects. I quilted this to the bag panels which helped provide the extra stability I lost when I changed the construction. The quilting, despite using a walking foot AND having design lines to follow, is kind of wonky… Quilting is not my forte! Despite the lackluster quilting, I absolutely love the end result inside the bag. I think the quilted underlining really gives the bag a high quality look!

Other changes I made:
- I flip flopped from the directions which fabric I used for the front and back of the pocket so that I could enjoy more of the print. I also made the pocket wider since there was plenty of room to do so.
- I changed the order of sewing so that the folded over top hem of the bag was sewn last. I did this on my Railroad Tote too. By saving it until last the tops of the side seams are concealed instead of exposed.
- Longer straps. I like to wear my bag over my shoulder and longer straps make it more comfortable when I do.
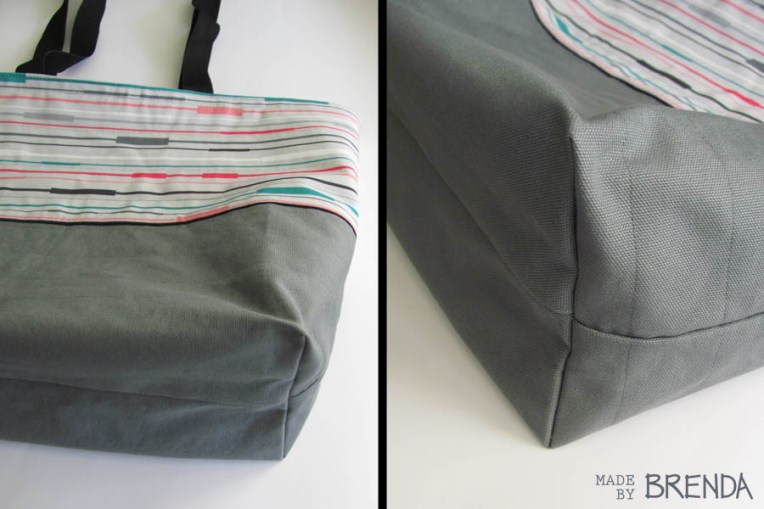
I chose to use 2 different colors of bias tape instead of one and I am very happy with the results. On areas where I wanted the trim and finishing to stand out (like on the exterior seam or around the top of the tote fold over hem) I used black. To finish all the interior seams I used white.


The webbing I used for the straps (linked at the end) is a bit industrial. It works ok… especially since the Eco Canvas is also a synthetic, but I wouldn’t get it again. I purchased a large roll of it and have a lot leftover, so it will probably pop up in another project at some point. It was a really good deal though, and should be pretty durable (I hope).
I was hoping that this bag would work as my music bag and I am happy to report that it works perfectly! My previous bag was a freebie tote that I got when I worked in Architecture. It was rather ugly and advertised a window company that I am not even a big fan of (otherwise I might have posted a “before” photo). I love having my new “chic” bag that is me-made and features one of my own designs! It holds all my music, books, and misc. with room to spare! (And even packed can sling over my shoulder!)

DETAILS SUMMARY:
(I have seen others do a summary like this and think it is a fun way to provide quick access info all in one place. I will probably make it a regular feature of my sewing posts.)
Pattern: Free Everyday Tote from Purl Soho
Fabrics:
- Transit Lines printed on Eco Canvas
- Kaufman Big Sur Canvas in Solid Gray
- Cotton Lining: Timeless Treasures House Designer, Crosshatch Sketch in Fog
Notions:
- Pellon Interfacing, Lightweight, Fusible (I can’t remember the exact #)
- 1 package each white and black bias tape
- HipGirl 1 1/4″ Black Polypro Webbing
- Sewing label designed by me and printed by Spoonflower
That about wraps it up! If I missed a detail that you would like to know about feel free to ask in the comments!
Thanks for Reading!
Brenda
