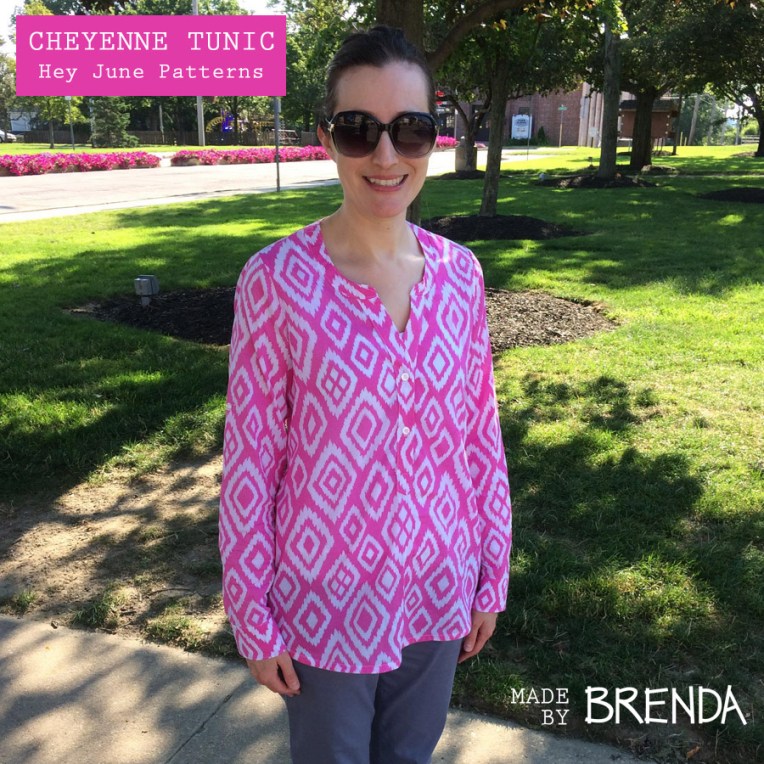
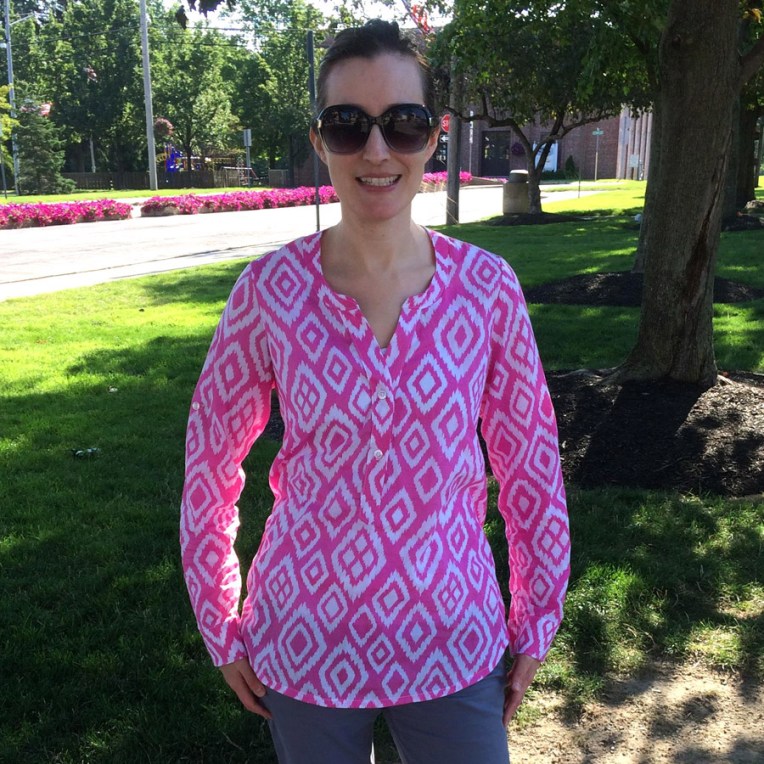
Hi folks! I am here today to share my most ambitious sewing project to date. And while it is not perfect, I still consider it to be a HUGE SUCCESS. I present for your reading/viewing pleasure… the Cheyenne Tunic by Hey June Patterns.
This is the third pattern I have sewn up from Hey June and I have to say that I am continually impressed by the quality and detail of both the patterns and instructions. In fact, besides loving the popover view with the non-traditional partial placket, a huge reason for me picking this particular blouse as my first official button-down project was because it was designed by Adrianna of Hey June. Having sewn many, many patterns by Indie sewing pattern designers, I can say that while MOST have been good, there have been disappointments along the way. But Hey June is a tried and true brand for me so I knew it was a safe bet for my dip into the next level of sewing. Plus it gets great reviews! Adrianna’s instructions and illustrations are top-notch. She also has an online photo-tutorial sew-along. Normally I am an illustrations over photos gal, but for some of the techniques I found having both very helpful!
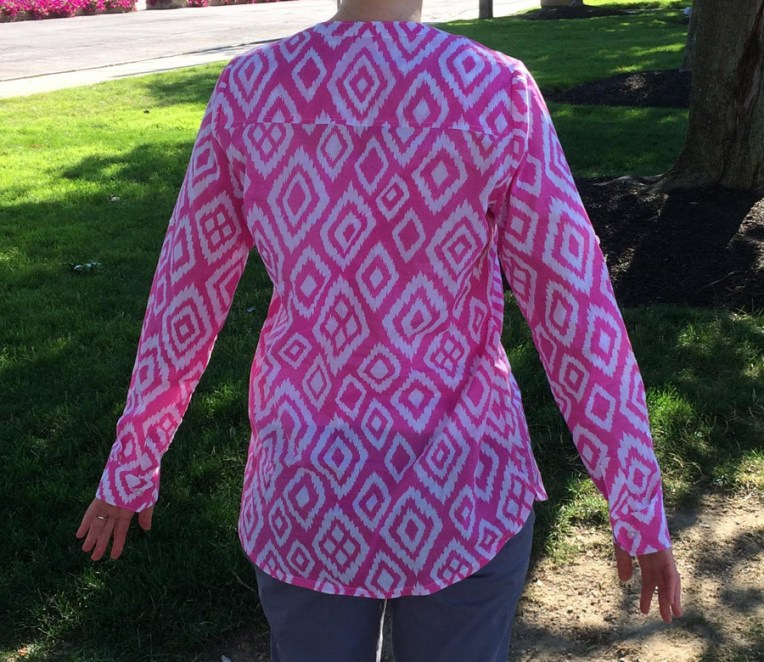
Since I had not done many of the skills included in this pattern I decided to make a full practice version of the top instead of just a quick fit muslin. I found this very lightweight cotton at Joann’s for a MEGA bargain after all the discounts and coupons were applied. I did not bother with pattern alignment. The design is not symmetrical even though it might appear that way in places. It is only on the back yoke where it might look like I tried but failed to pattern match.
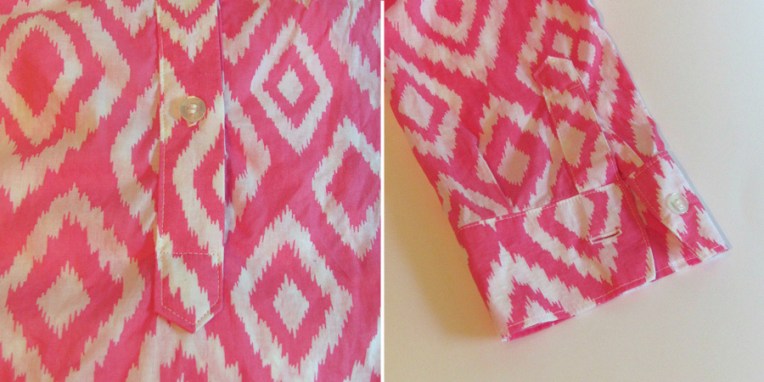
This pattern comes with A LOT of options, most of them interchangeable (making it a really great value too!). I chose the View B placket/collar, tunic length, long sleeves with roll up tabs and no pockets (This fabric is WAY to busy for pockets). Even though these were my first button plackets (and first time using the button/buttonhole feature of my sewing machine) I found that it was the COLLAR that actually gave me the most difficulty. It is a little wonky, especially at the front tips, but not super noticeable when it is on.
I made the pattern mostly as written (a rarity for me), adding a little extra top-stitching since I prefer it all the way around the plackets instead of up just one side. I didn’t do this until the sleeve plackets and decided it was too difficult to add after the fact to the front center. Next time I will do that everywhere.
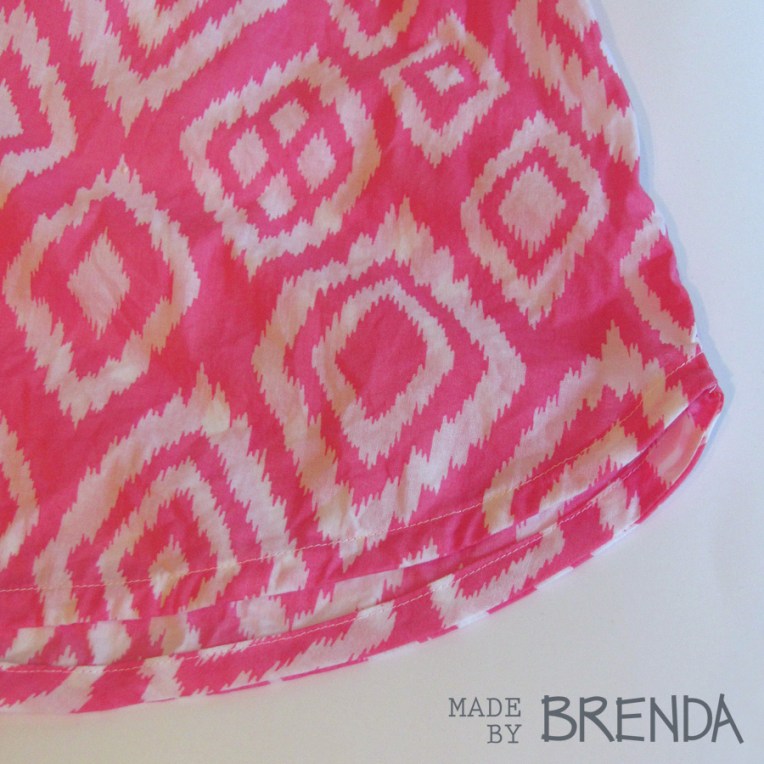
My other change was to use self-fabric bias tape for hemming the bottom. I find I have more success hemming curves this way and after struggling with the curves of the collar I definitely preferred to use the bias for the bottom!
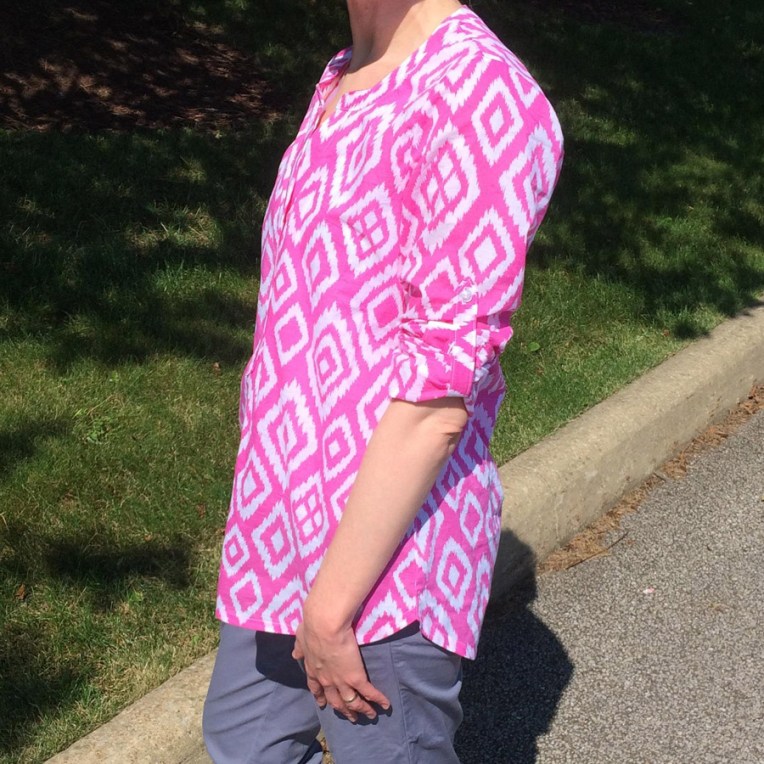
FIT: So this is technically my muslin for this pattern and after all the work I put into it, I am very thankful that it fits well enough to be wearable. I do, however, plan on making some changes for the next one. For reference, my measurements put me in a size Small for the bust and size Large for my hips (Pear shaped gal here.) Based on the finished garment measurements I felt that I could get away with only grading to size Medium on bottom and still have enough ease. And I do. But I would like a little bit more. And since one of the perks of sewing your own clothes is getting garments tailored to your body, I am tweaking my next one to hopefully be my perfect fit. I actually just finished creating new pattern pieces for my changes today. The fit of the front of the tunic is good but I do want more width for my hips so I am adding width to the back only in two ways/places: A tiny bit through the neck and yoke (I have wider shoulders and this will give me just a bit more room across my upper back) and then a lot more width though the back main piece. I plan on creating a pleat in the top center where it attaches to the yoke (a common detail on button-down shirts). The other change I am making is to NARROW the sleeves! Yes, I am making the shirt larger on one end and skinnier on another! I have skinny arms (apparently skinnier than average) and a “skinny arm adjustment” has been a common alteration for me since I started making clothes. On this version, the sleeves have been riding up my arm as I wear it and bunch up near my elbow (I do not even need to unbutton the cuff to put it on). So I am tapering the sleeves to an extra small on my next one. I have high hopes that these two changes will get me to my perfect top!
Buttons and Buttonholes: As I mentioned this was the first time doing these on my machine and I was extremely happy with how it handled them. The apparatus for making the buttonholes is not the sturdiest but it gets the job done. My only complaint is that it does not seem to be consistent on where it starts the hole and thus it is a bit unpredictable where the finished hole will be positioned. This is not a big deal for solo buttons or even pairs (like on the placket). But would be if I had done a full placket. Other than that, NOT SCARY!
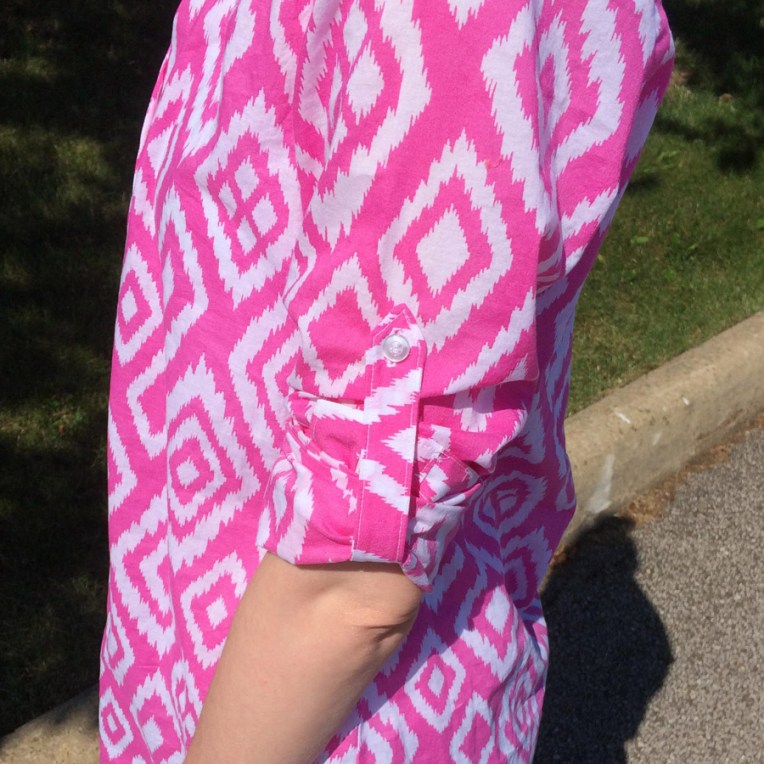
Here is a close up of one the special details of this top, the sleeve tab! I picked long sleeves for the first one but it easily converts to elbow sleeves simply by rolling up and securing with the tab! You might notice that the buttonhole is slightly too close to the tip. This is one of those locations where the buttonhole did not start/stop where I expected it to. Otherwise, I think it looks pretty great!
Overall, I would say that this top was a pleasure to sew! There are a lot of pieces to cut. And a lot of steps. It took me quite a long time to complete. But it was so satisfying! And the end results, even with my imperfections here and there, look so professional! Whether you have never made a button-down shirt or are an old pro, I highly recommend this pattern! I very excited about my next one!
As always, thanks for reading!
Brenda
