I super excited about this post and to share the theme for the 2018 Alphabet Art Challenge! If you are new to this Challenge you can read all about the first one, The Alphabet ANIMAL Art Challenge, here. You can also read each of the quarterly updates here, here and here.
And so without further ado, and perhaps a little drumroll…. The 2018 theme is:
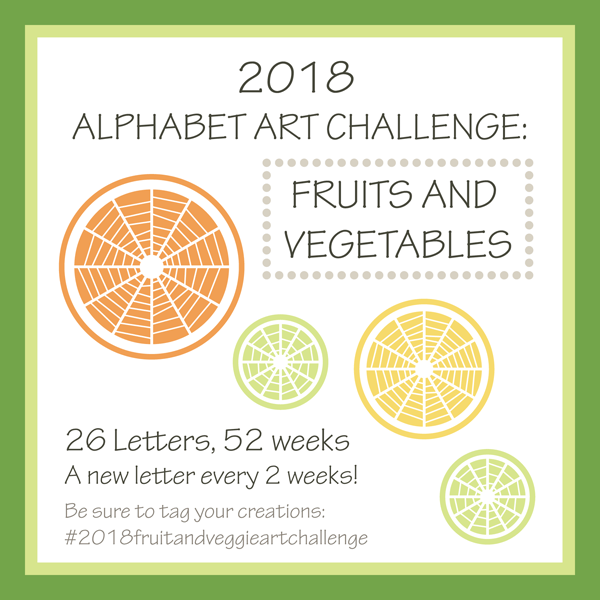
FRUITS AND VEGETABLES
Yay!!!!!!!!!!!! (At least, I am hoping that is what you are thinking.) I am very excited about this theme. While the Animal theme was a great challenge to me personally, and I will be sharing a lot of thoughts about it all when I do the final recap of the year, I am looking forward to having a little bit simpler subject matter this time around.
The OFFICIAL name for this challenge will be the Fruit and Veggie Challenge, because that is more fun in my opinion, and makes for a shorter hashtag: #2018fruitandveggieartchallenge
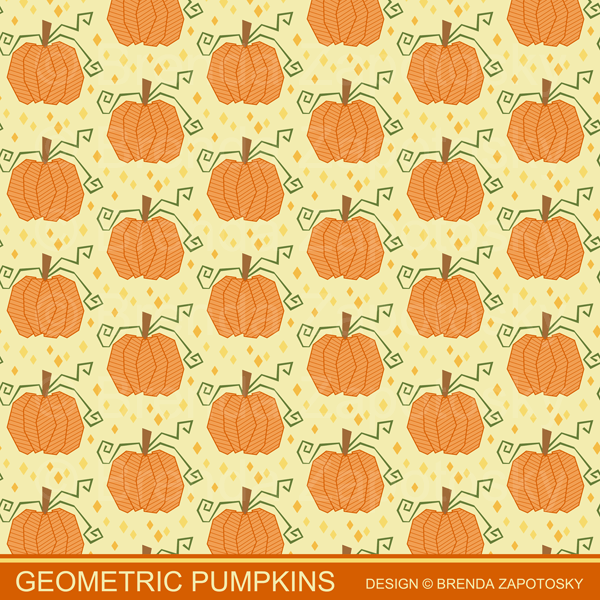
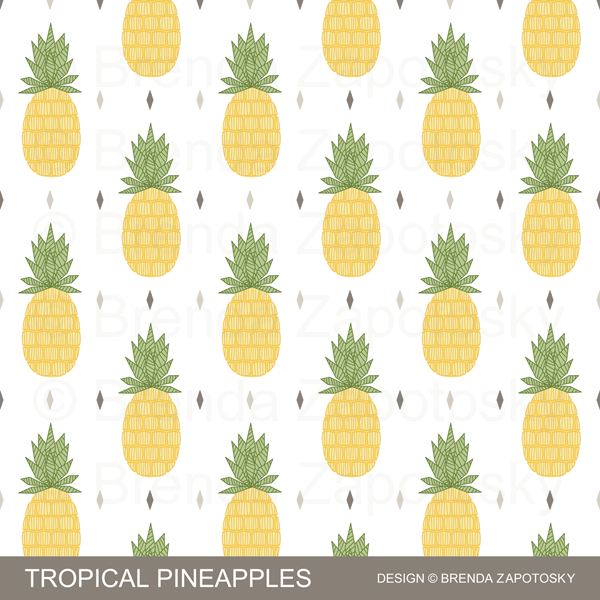
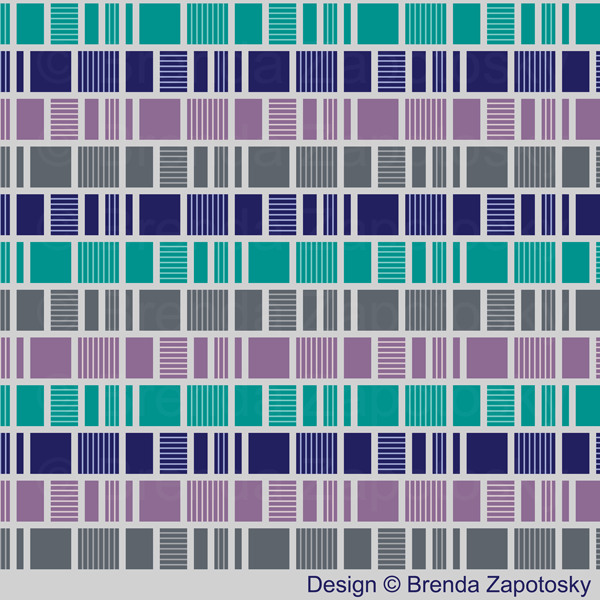
For this theme I have a very distinct vision for the style of the art I will be creating. Since my days of doodle books, starting way back in college, I have LOVED hatching. And one of the style methods I employ a lot in my artwork is creating “geometric” versions of common objects. So for my fruits and vegetables this year, they will be geometric in style and employ hatching as part of the rendering. I already created some patterns that use geometric fruits and vegetables, so I will be building upon that small library. Here are a few examples (Which are available as fabric, wallpaper and gift wrap in my Spoonflower shop) :
As an added “bonus” this year, I have also decided to create a new geometric font to go with my fruit and veggie illustrations, which will add an element of Art to the “Prompt” posts that I do at the beginning of each letter. (You can see examples of the prompts on my Instagram feed.)
Ok, so onto the official “rules” for this Challenge. There are 52 weeks and 26 letters, so that means 1 letter for every 2 weeks. Since 2018 starts on a Monday, that will be our starting day for each new letter. So Monday, Jan. 1 will kick off the letter “A”. On each Monday where a new letter begins I will post a reminder on Instagram with the letter for that 2-week period and some ideas of fruits and veggies to get you started.
Like last year, this is JUST FOR FUN! There are not any prizes for participating. Use any type of medium you like to create your art. And if you are late to join in or miss a letter or 2, that is totally fine! I would like to do an artist round up like I did for the first quarterly recap of 2017. Sadly participation last year drastically tapered off after that first quarter, so the other recaps did not include other artist’s work. I hoping that there will be more participation this year and I will able to share a bit more of other’s work.
So get your artistic thinking caps on and start mentally prepping for a year of Alphabet Art Fun! I really hope you will consider joining me!
Brenda
ps. If you are not already following me on Instagram, I highly recommend it. It is where I will be posting all the prompts and fruit and veggie creations.
Hi folks! I am back with the third recap in my year-long Alphabet Animal Art Challenge. 3/4 of the way through! If this is your first time learning about the challenge you can see my original post here. And recaps 1 and 2 here and here.
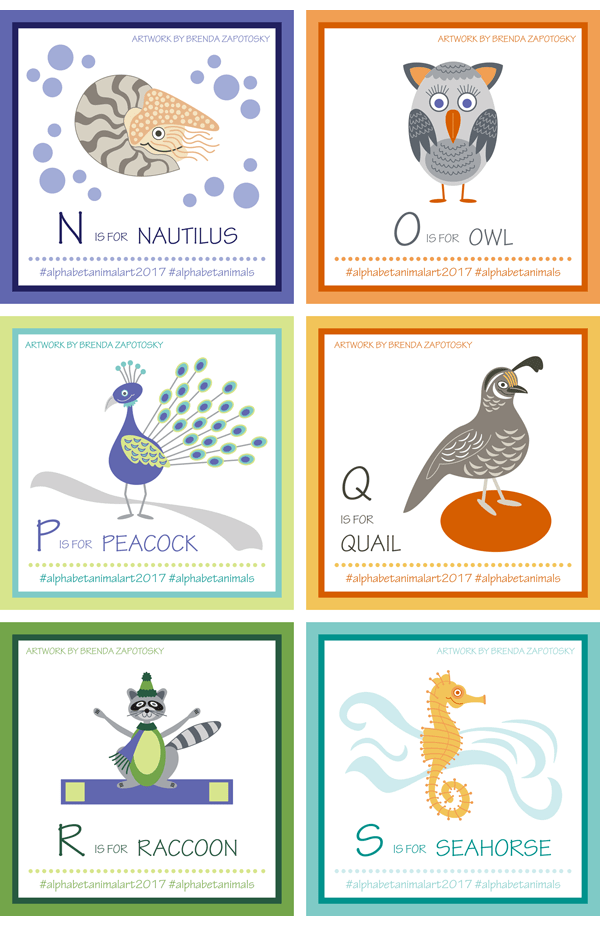
Let’s start with a look at the 6 animals I created for this portion of the challenge:
3 birds and 2 sea creatures in the mix. Very interesting. Not sure if I can narrow down a favorite. Instead I’ll make it a tie and choose both the nautilus and the peacock! Here is a closer look at both of those:
I don’t know how “marketable” the nautilus is to use for other things, but I just love him! The peacock on the other hand would be fun to incorporate into a pattern or a card. I particularly love his fat belly and his feathers! I could see a coordinating pattern using just those ovals from his feathers.
I have used one of the animals so far in a greeting card design. The owl! Here is a look at the super cute birthday card I designed in 2 colorways:
I especially love the new colorway I did for the second card with the pink and teal. It would be fun to do a whimsical geometric owl collection using these two colorways.
Final thoughts:
This round was the same as most of the rest in that some animals were easier than others. I write about my thoughts about each creation individually when I post them on my Instagram feed so I won’t bother rehashing that here. One thing that is interesting: I did not give any of these animals names! I am big time into naming things so it is a little bit surprising that not even one was named.
With only 7 letters left, I anticipate some challenges in this final quarter. I normally don’t research the next letter until I am ready to do my prompt post shortly before the Sunday I post it, so I really haven’t looked to see what my selection will be for the upcoming letters. I can think of a few, but not many. I have a hunch it will be slim pickings and possibly some creativity involved to get an animal for the rest of the letters (or else being force to draw something either really obscure or not very fun). The adventure continues!
I guess that wraps it up! I’d love to hear from you in the comments. Which animal was your favorite this round?
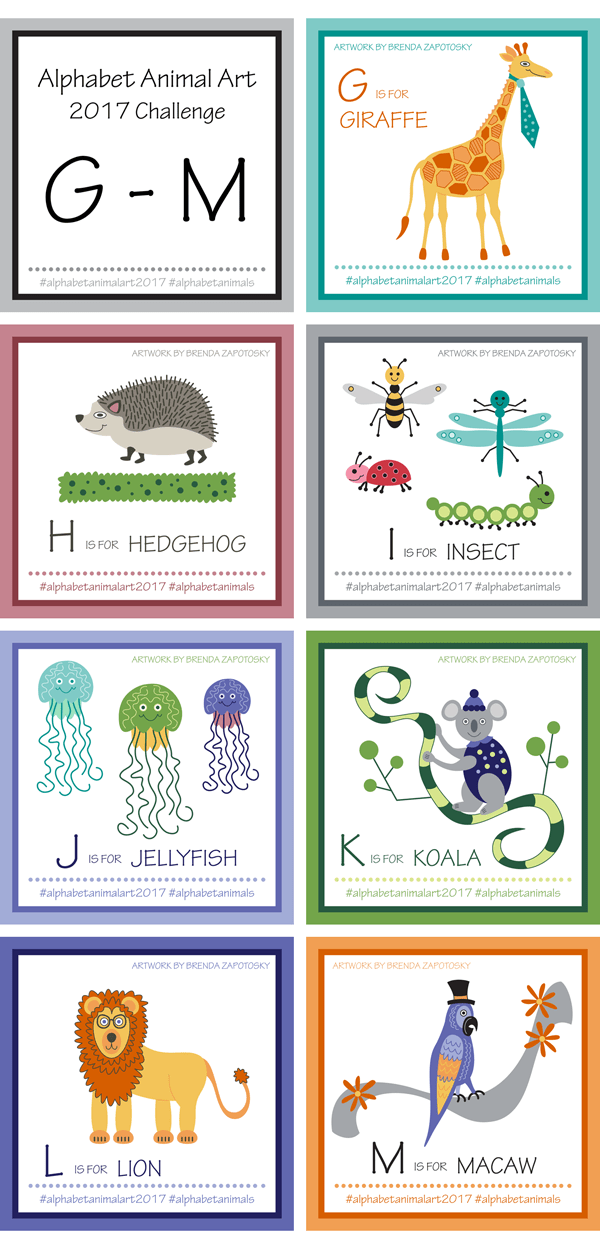
Well folks, we have officially reached the halfway point of the Alphabet Animal Art Challenge and it is time for the second recap for the year! As time has progressed, I have found that participation from other artists is dwindling. Bummer? Yes. But… this began first and foremost as a personal challenge to myself and alone or with a crowd, I will continue until the end! I certainly miss seeing other’s people work inspired by the letter prompts, but I totally get the difficulty of sticking with any challenge for a full year! Honestly, it has been hard for me for a few of these letters to want to spend the time creating anything, especially when I was uninspired by the choices. If not for my determination to stick to my goal I might have stopped too! (Or at least skipped some letters). But I persevered and am happy I did. Today I am sharing a look at the second batch of animals, G-M, and sharing some designs I created that incorporate animals from both the first and second round of creations.
Letters G-M There was definitely a lag in excitement when I hit the middle of this batch. Letters I and J were not very inspiring to me. I came up with the idea to do multiple insects for I, which ended up kind of fun. But J… the jellyfish you see here was actually just a re-working of an old illustration (and then scaled twice to create 3 different sized ones). Thankfully the Koala helped me get some of my enthusiasm back!
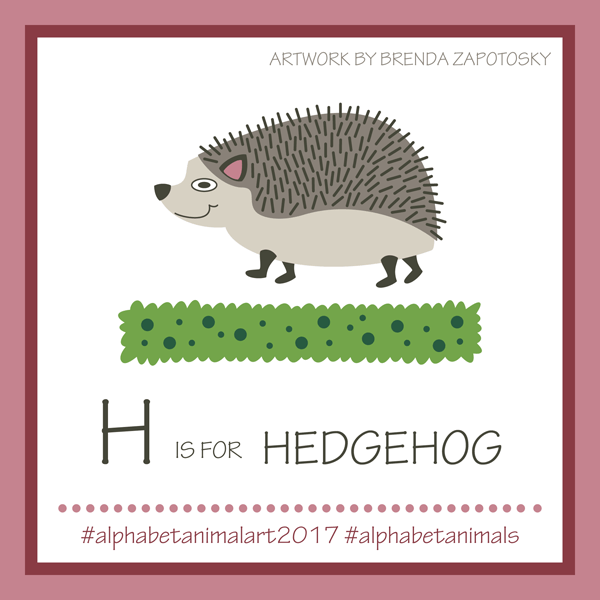
I think my favorite of this batch is the Hedgehog. I would definitely like to create a pattern for him using a maze of green hedges!
Pattern and Cards: So far I have incorporated 4 different animals from the challenge into either cards or a pattern. These include my giraffe from this batch of illustrations and 3 other animals from my first round (Letters A-F) of illustrations. I absolutely love that I am building a library of animal illustrations, in my style, that are all ready to be used in other ways.
I created a seamless pattern with my flamingo for the Birds and Blooms Design Challenge on Spoonflower. I absolutely love the bright, happy palette and am in the process of creating an entire collection around the signature print: Flamingos and Flowers.
The collection is not finished yet, but you can find the first two coordinates of Floridian, as well as the flamingo print available now in my Spoonflower shop.
I also created some greeting cards using my animal art designs too!
The cat card was a birthday card for my husband. The giraffe card was actually a MOTHER’S day card (my mom loves giraffes) but I kept the greeting on the front generic to give it better flexibility for future use. I had both a niece and nephew turn 2 in June, so I actually did 2 different colorways of the elephant card. In my “girl” version (below) the elephant has pink toenails like in the original illustration, although in a brighter shade of pink!
These cards were a lot of fun to put together. I could see an entire line of animal cards along with maybe some matching gift wrap being developed at some point. For now, I am enjoying creating them as the need arises.
Overall, I will call round 2 a success! It is quite incredible how many different animals there really are! I have discovered many “new to me” animals along the way. Next up is the letter N, which marks the beginning of the second half of the alphabet. So if you wanted to join me, or jump back in if you started and fell behind, this is a great time to start!!!
And be sure to follow me on Instagram, to see each animal as I finish them and see the reminder posts and animal idea prompts each fortnight!
I am thinking of starting a new regular series of blog posts: Sewing and Design Meet. A place to showcase those projects where my fabric designer self and my sewing self come together to create a project! (Or in simpler terms: When I sew stuff with my own fabric designs 🙂 ).
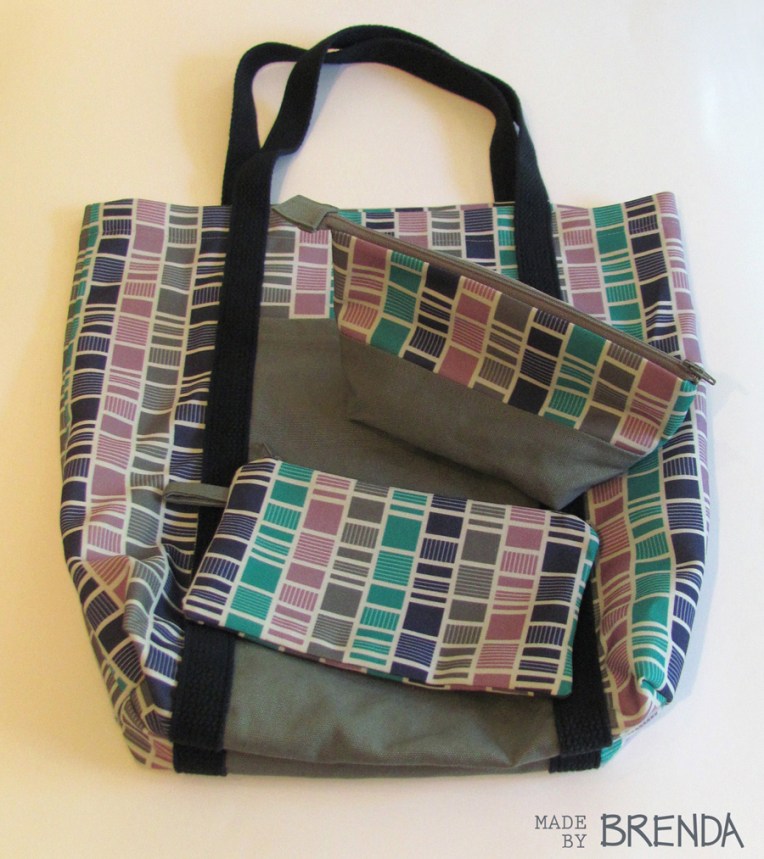
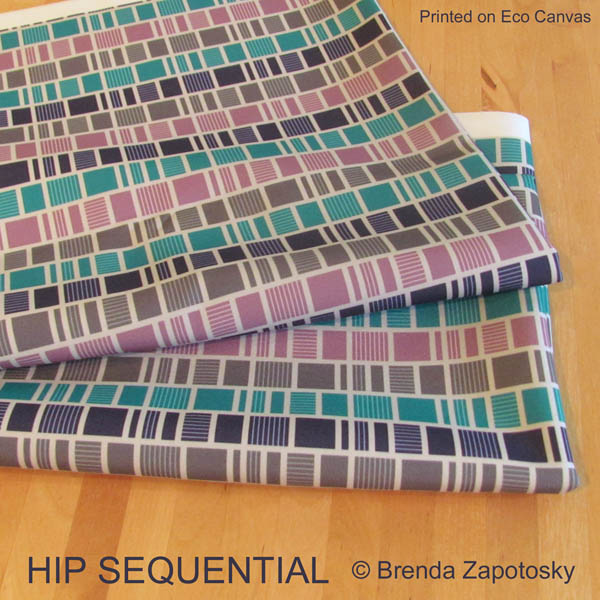
I am kicking off the series with a trio of bags created from 1/2 yard of my Hip Sequential (Cool) design printed on Eco Canvas by Spoonflower.
DESIGN:
A look at the pattern:
This pattern was actually created during a special Spoonflower design challenge last spring. The theme for this day of the challenge was geometric and I had a little flash of inspiration! I really liked the idea of solid and divided rectangles slowing getting smaller in width in sequential order. The end pattern worked so well with my existing Hip Geometrics Collection I have since added it in all four collection colorways as well!
SEWING:
When I ordered my fabric, Spoonflower did not yet offer their Fill-A-Yard service so I had to create mine manually by uploading a full yard design file divided into two patterns. My thought was that 1/2 yard on the wide fabric should be enough for two bags/totes of some kind, although I did not have a specific pattern in mind when I ordered. I chose Eco-canvas as my substrate as Spoonflower was having an amazing 1/2 price sale on it at the time. A look at the printed fabric:
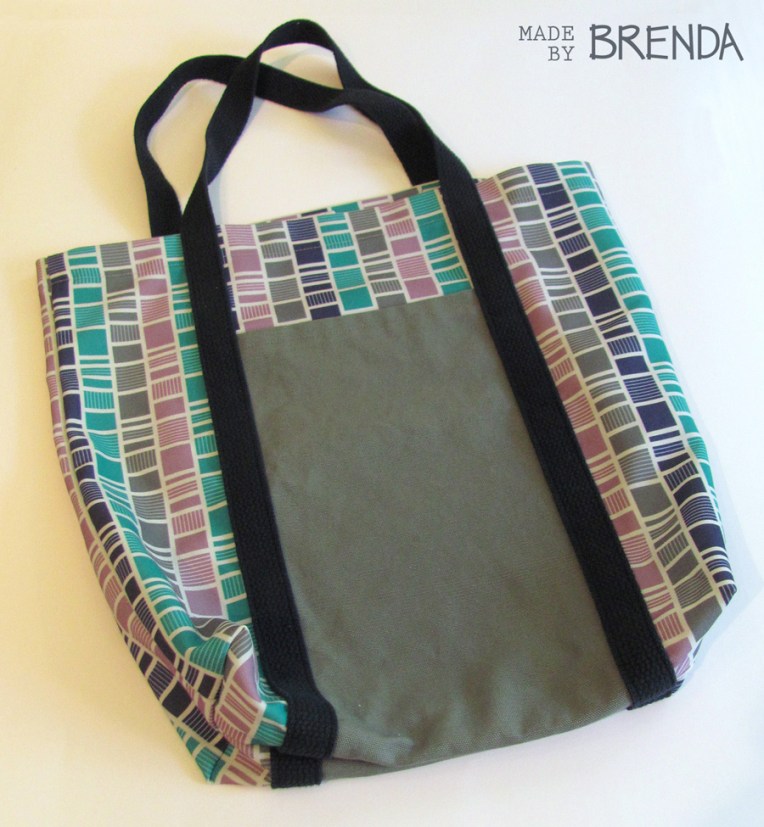
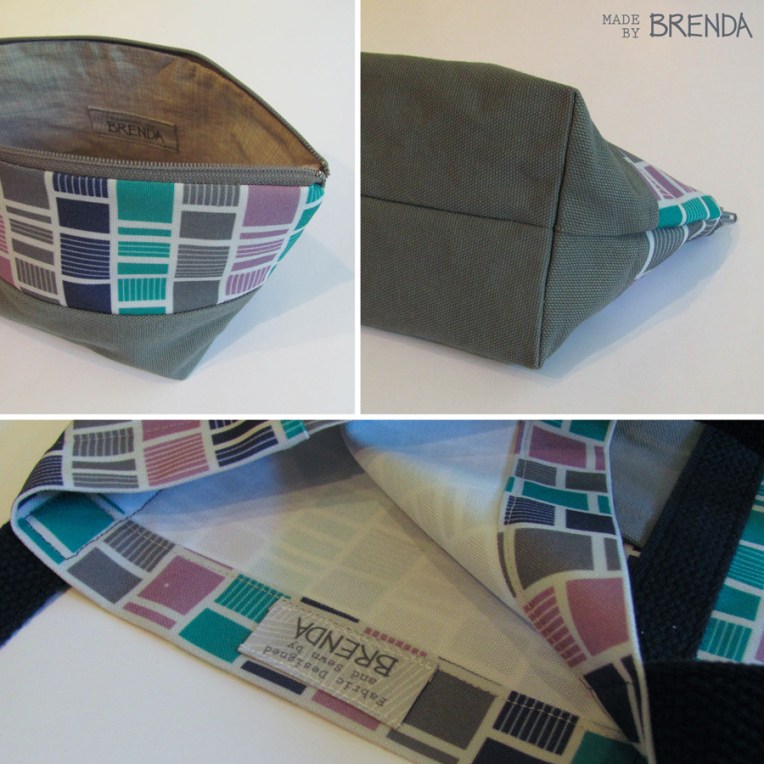
I had the fabric for quite a while when I saw a few free tote tutorials by Purl Soho and knew I had found the right bag for this print! For this pattern I chose the Railroad Tote. I thought the rectangular shape was a good pairing for the geometric print. To pair with my fabric I purchased some Kaufman Big Sur Canvas in Solid Gray. Buying online is usually a bit of a gamble (unless you have purchased the exact product before) so I was quite excited to see how perfectly the canvas I chose matched both this print AND the other pattern, Transit Lines, I had printed with it.
I mostly made the tote per instructions. Since I had plenty of the canvas and I like pockets on my bags I decided to add the pocket to BOTH sides of the tote. I also changed the finishing order a bit so that I could have the tops of my side seams enclosed in the folded over edge of the top of the bag. This required a few more steps and was a bit trickier to sew this way, but well worth it for the final result!
I am very happy with how the bag turned out but I would make a few tweaks for the next one. The side pockets end up being very tall and skinny. While the look from the outside is quite lovely I would prefer them to be less deep, so next time I would modify them somehow. I also plan on making it bigger overall.
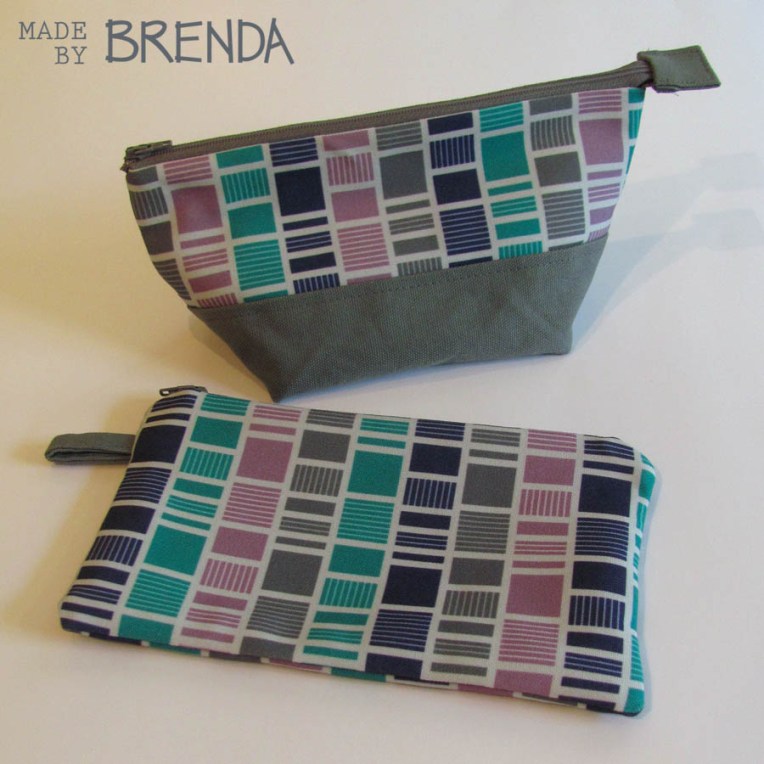
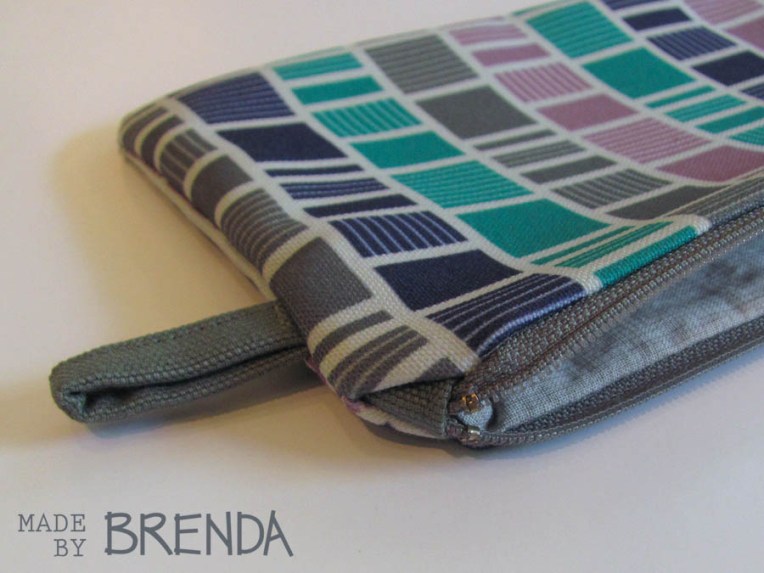
I had a long skinny piece of this print left over and plenty of the gray canvas so I decided to sew up some zippy pouches with the left overs. Originally these were supposed to be a bigger and smaller pouch in two different styles and the zippers I purchased for them are 2″ different in length. However, I did not anticipate that the style of the bigger pouch made it appear smaller and the extensions I added to the smaller pouch would increase its size so much. In the end they are almost the same size!
For the “larger” pouch (Top bag in the photo) I used another free bag pattern: The Open Wide Zippered Pouch by Noodlehead. I have used this pattern before and it is a really nifty design! (Do people still say nifty?) I can’t remember for sure which size I made but I think it was the smallest one as I am fairly certain I used a 9″ zipper. I know the pattern calls for 10″, but you really can’t find that easily at any stores by me. Not sure if I made the bag smaller to compensate, but having made it before I knew that the zip overhangs a lot so there is definitely wiggle room there.
The “smaller” pouch is just a basic rectangle lined zipper pouch using a 7″ zipper. To give it a little extra flair I added the little canvas loop to the side. I also chose to add canvas extenders to each side of the zipper so that the ends wouldn’t pull into the sides of the pouch. I used the technique outlined by my fellow Spoonflower designer and friend Ceri for her cut and sew pouch project: The Hand Strap Clutch. You can see both details in the photo below. You can also get a small glimpse of the lining. For both zipper pouches I used a “textured look” quilting cotton, “Crosshatch Sketch”, that I purchased from Hawthorne Threads. They no longer have the color I chose: Fog, but there are several other colors available that might pair well with this print. There are of course many color match choices in my Spoonflower shop too, including this teal color version of my Hip Shapes design.
One last note: The Eco-Canvas is not as stiff as normal canvas (definitely not as stiff as the Big Sur Canvas I paired it with) and tends to flop around a little. I highly recommend using interfacing if you want a bit more structure to whatever you are making with it. I added a very light interfacing to both zippered pouches and really liked the bit of structure it gave. Unfortunately the inside of the canvas is exposed on the tote so you would have to give it a lining if you wanted to add interfacing there. I have the other 1/2 yard of my Eco-Canvas left with the other print I chose to use for a second tote and I am currently brainstorming ideas of how I can add lining/double layer to the top pieces, so I can interface that one! If anyone has any suggestions, I will be making the Everyday Tote with it.
It is June! Which means that Me-Made-May has come to a close. For those who don’t know, Me-Made-May is a month long event where sewists from around the WORLD pledge to wear their handmade clothes regularly all month long! Most wear them every day of the month. If you follow me on Instagram you already know that I participated in Me-Made-May (For the first time!) this year. Now that the month is complete, I thought it would be interesting to do a recap of all the outfits I documented (some of them never before posted) and share my thoughts on the experience. I did not pledge to wear me-mades everyday since I work from home and there are many days I don’t leave the house. Honestly, though, even most of those days I did end up wearing me-made either as lounge wear or pajamas (or both) but I did not take photos. May was, however, an unusually busy month for me, between birthday celebrations, family visiting from out of town, and my husband being home for a staycation for the last few days of the month, and I ended up being out and about way more than usual which gave me a lot of opportunities to dress in handmade. We had quite cool weather for a good part of the month which really stretched my options. In fact, if I had planned better I would never even have repeated an outfit! (more on that later). For sharing purposes I am posting my documented outfits by week (Sunday thru Saturday), with a list of the garments I wore. Most if not all of my garments have been altered from the pattern at least a little (it is rare that I make a straight size of anything) and in some cases A LOT. This post will get WAY too long if I share all my modifications but if you see a garment you like and want to know how much I altered it I encourage you to leave a question in the comments and I will be happy to share details!
Ok… On to the good stuff!
WEEK 1:
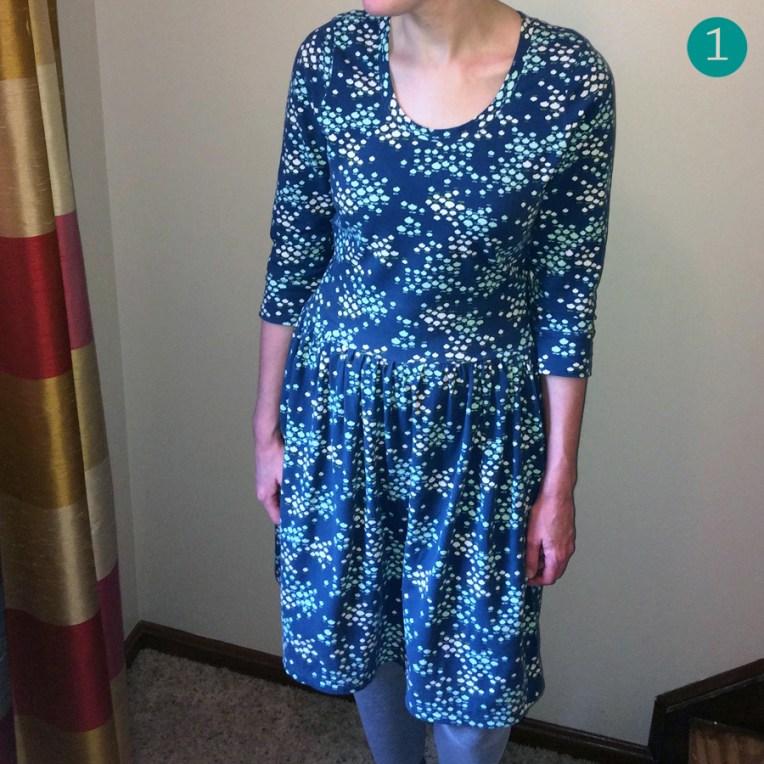
1. May 6: Out and About Dress by Sew Caroline in Buttercup Drops by Amy Sinibaldi, an AGF knit I got for my birthday! (Sorry for the poor quality photo, it was raining this day and there isn’t a great place to take photos inside my house).
This was my only repeat during the month and if I had planned better I would not have had to repeat at all. I wore this dress to sing for a First Communion. In hindsight, I wish I picked a different handmade dress since it was my sister who gave me this fabric and she came to visit from out of town later in May so I wore it again when she was here. Not a big loss though since, thanks to my modifications, this dress fits me super well and is super comfortable. And I was able to get a much better picture when I wore it the second time (it was raining this day).
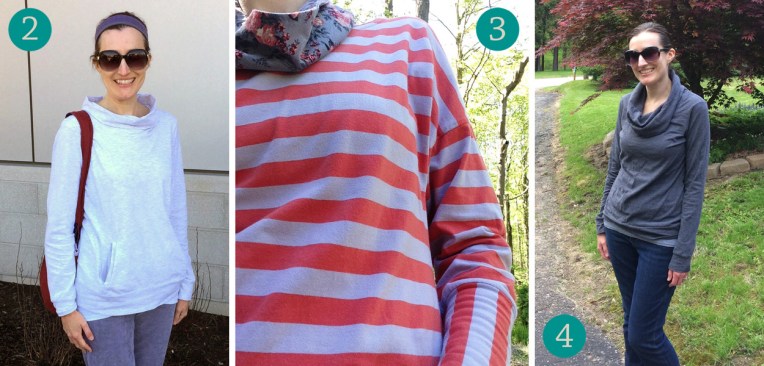
5. May 14: Bento Tee by Liesl & Co. in a Brushed Knit Blend from Cali Fabrics. Worn with a self drafted mini-cowl using my own fabric design: Party Triangles printed on modern jersey fabric by Spoonflower.
6. May 18: Lark Tee by Grainline Studio paired with a RTW Blouse. Obvious selfie photos. For the right photo, I was trying to show the armpit fit as I would like to have that portion fit a little closer. This is my first Lark and I think I will size down on top for the next one. I actually purchased this pattern via Sprout Patterns printed with one of my fabric designs and I couldn’t grade between sizes like I normally would. So I sewed up a sample of the straight 8 to test the fit. I think I can grade the top smaller, even on the pre-printed fabric so I will try another practice one like that.
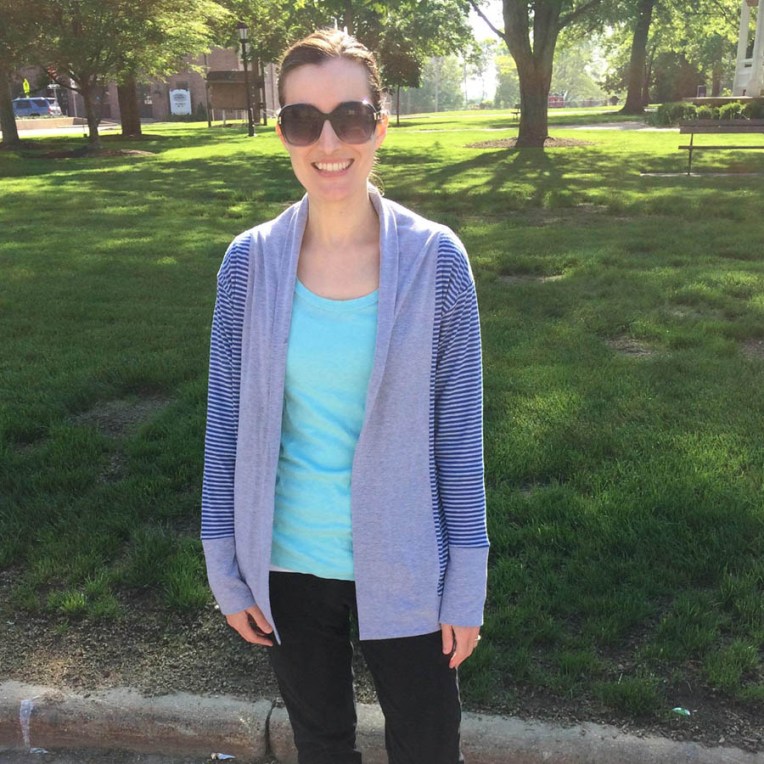
7. May 19: Oslo Cardigan by Seamwork in this awesome Chocolate Heather Jersey from Cali Fabrics. This fabric almost looks like wool and has a lovely drape! Worn with an infinity scarf made from the same fabric.
8. May 20: Another Out and About Dress, peplum top version. This was actually my wearable muslin for the dress. I made some bodice changes for the dress version, but as top I kind of like this fit!
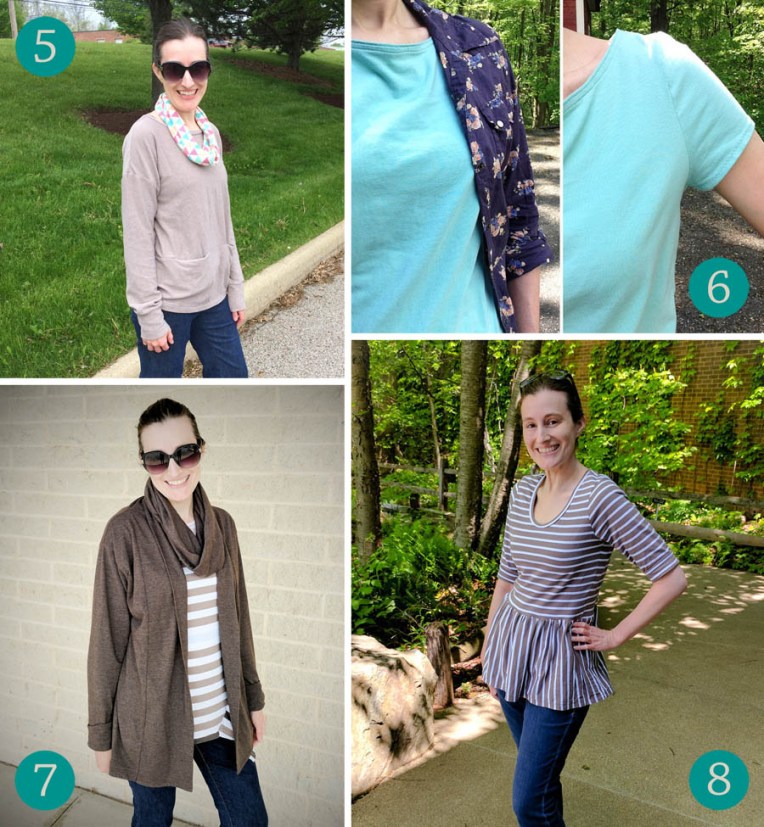
May 20th was actually a family outing day to the Cleveland Museum of Natural History and we were a handmade wearing FAMILY that day. My mom, sister, husband and I all wore handmade!
From Left to Right: My mom wearing a Lane Raglan sewn by my sister. My sister wearing an Akita top and Oslo Cardigan that she made herself. My husband wearing a Paxson shirt that I made for him. And then of course me!
WEEK 4:
9. May 21: Repeat Outfit! Out and About dress. I actually wore 2 different outfits out in the world this day. The second included the Primrose Peplum but I never got a photo of it.
10. May 22: Lane Raglan by Hey June Patterns in Shore Remains by Pat Bravo, another AGF knit. I quite liked my whole outfit that day! Everything else is RTW. I did wear this top on April 30 and shared it as a PRE Me-Made-May since I knew I wouldn’t officially start until well into the month, but since it was April when I wore it, it is not technically a repeat!
11. May 26: Another Lane Raglan. I call this one my Sunset Stripe Lane. I think the neckband on this one is a tad too big but there is no way I am redoing it since the body fabric is too thin to risk the unpicking. This was made very early on in my handmade wardrobe endeavors. Paired here under a RTW knit blazer I love. You can see a full look at the top here.
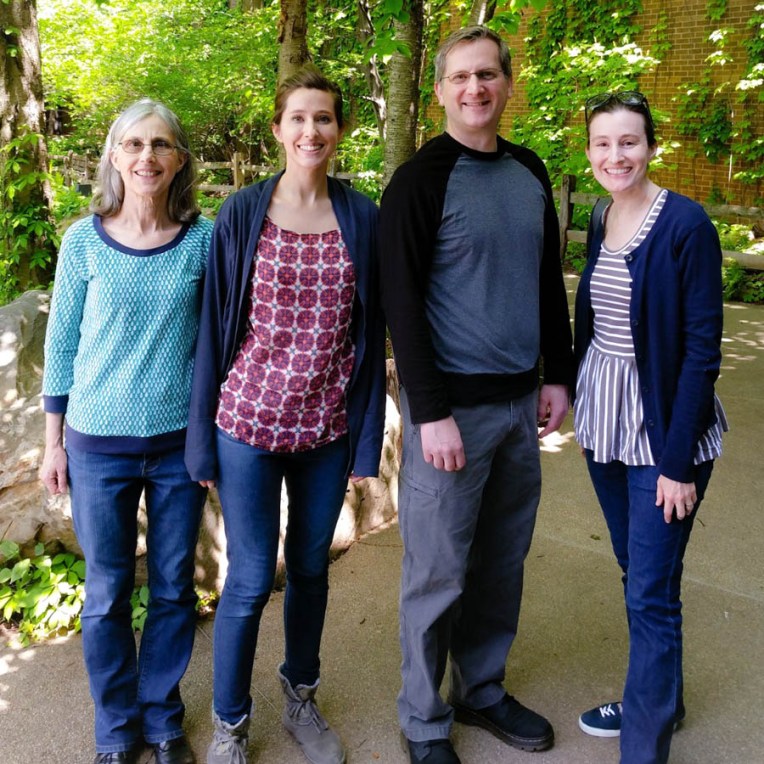
Wanted to share one other photo from this week. It is of my sister and I BOTH wearing Out and About dresses! We are long-distance sewing buddies so it was really fun to have her in town and get to see each other’s makes in person! Her version is her wearable muslin.
Sisters in Out and About dresses!
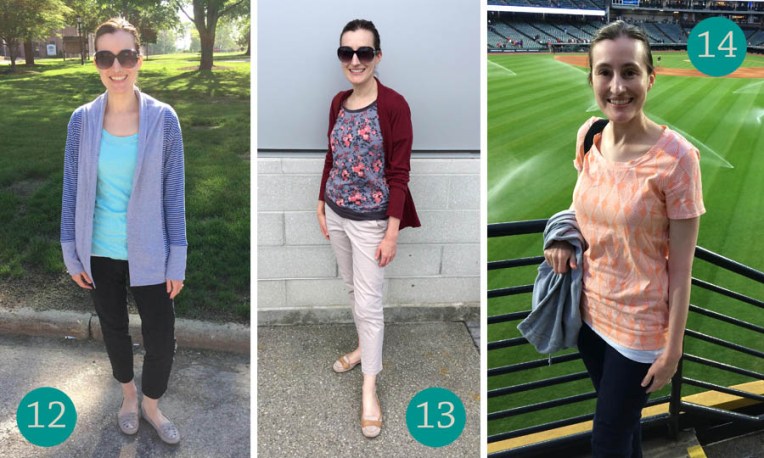
WEEK 5:
12. May 28: Oslo Cardigan by Seamwork. My newly finished second one, that is heavily modified to achieve a better fit compared to the first.
13. May 30: Another Renfrew Top by Sewaholic, this time short sleeved with a scoop neck. Paired with one of my favorite RTW summer cardigans.
14. May 31: Renfrew Top, again, in another AGF knit. This design is Plumage by Bonnie Christine. No longer available where I purchased it (On sale!), but you can find it here.
Wow! 14 documented days! I hope all this info is useful to someone 🙂 If you want to read a little bit more about the days activities, more garment details, etc. I often shared more those on my Instagram posts.
FINAL THOUGHTS:
Overall, Me-Made-May was a lot of fun!
The photos became a little tedious. I know that sharing photos isn’t really required to participate. It is ultimately about the wearing and not the social media sharing. But, seeing everyone’s photos throughout the month is so much fun and, at least for me, I like that part of it.
I did not share any bottoms! This does not mean I do not sew them. It has not been hot enough for me to wear skirts with bare legs yet. I do have 2 pairs of PJ bottoms I wear regularly but the fit on both is pretty bad (I need to find a new pattern because my current “freebie” one is not very good) so they won’t be shared. So a definite goal is to have some real pants made for next May! (Plus I really NEED new long pants too).
I did feel a little extra pressure to plan outfits, which did take away from some of the fun. I love my handmade wardrobe and don’t need an event like this to motivate me to wear my me-mades. I WANT to wear them. Me-Made-May took away a little of my spontaneity since I was thinking ahead of what I could wear so as not to repeat, etc.
Even though my handmade wardrobe is still in the “toddlers” phase of its existence, the small quantity of clothes I have are VERY wearable. I am happy to report that I have not fallen into the newbie trap of make clothes I won’t wear much. Although, that also means that I have a lot of basics, which might seem a little boring.
I guess that’s it! I hope you made it to the end of this LONG post and are still reading to see this! If you aren’t a sewist, I hope that maybe this post inspired you to consider jumping into the world of handmade clothes! And if you want to learn more about Me-Made-May, Spoonflower had a lovely blog post interviewing the gal who created it!
Hey art fans! Bringing you a little recap today of the progress for the Alphabet Animal Art Challenge I started at the beginning of the year. If you missed the original post you can find it here. We have now made it through the first six letters: A-F! (And are currently in the midst of the two week time frame for the letter G). Here is a look at the first 6 animals I chose to create:
So far I am very happy that I embarked on this journey. I have really stretched myself with some of these characters. It is forcing me to step outside the box. Here are some thoughts as I reflect on the challenge to this point:
Looking back on the first six characters you might notice that the armadillo looks a little different than the rest. I decided after I created him that I wanted to try for a more “cute” look to my characters and to be a little more playful with them. I think this has been achieved!
I have no idea why I chose bats for the letter B. It seems a weird choice to me now, although I did have fun creating their “looks”.
I thought the deer would be the most difficult for me but in the end it was actually the elephant that caused me the most trouble. She is actually my favorite so far though, so completely worth the effort!
Overall, I think I am starting to have a nice collection of characters to add to my portfolio and future projects! Ideas for incorporating them into seamless patterns are already running through my mind.
I am especially excited about how many others have joined in the fun! I absolutely LOVE seeing them pop up in the #alphabetanimalart2017 tag on instagram. Such a wonderful collection of creativity in a wide array of styles! Here is a look at some of the stand-out designs that were posted for the letters A-F:
I’ll start with the letter A. And first up is an alligator by Noa of worldofpineapple. I love the bold colors she chose for her illustration and the clever way she made her letter “A” match her animal.
Guncha from gunchakumar chose an Ant for her letter A. I love how she decided to have him pose with the letter itself! (Looks like the A is barely staying put!)
Next is the Letter B and for this one I have 2 different beavers to share!
Tina from tinatidesign created this adorable beaver! I love his over-sized teeth: Perfect for gnawing down the toughest of wood (or carving a pencil-like log!)
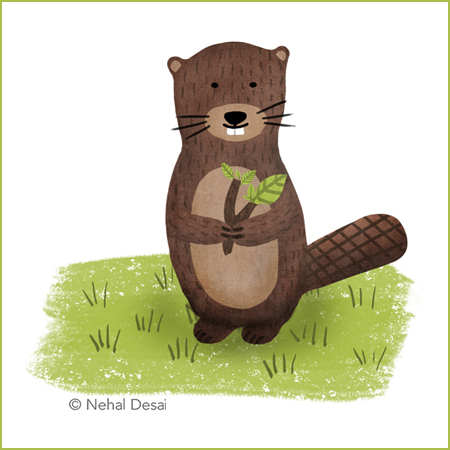
Nehal Desai of designedbynehal also created an adorable beaver. He looks so innocent holding that little branch! Love her color choices and the tones and subtle textures she achieved.
Onto the letter C! Stacey of peppypattern created a happy crab! I am a big fan of hatching and fills and I love how she creatively combined them with subtle color variations on its legs.
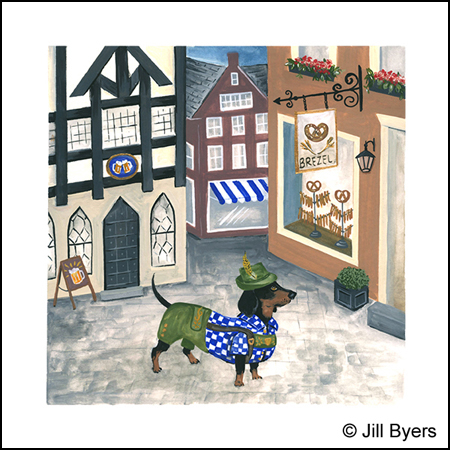
For the letter D we not only have a dog, but it is a dachshund! (Double letter D) This stunning illustration was created by Jill of jillbyersdesign. She has placed each of her animals in a lovely scene. I absolutely love the old German town setting she chose for her dachshund (and his matching lederhosen)!
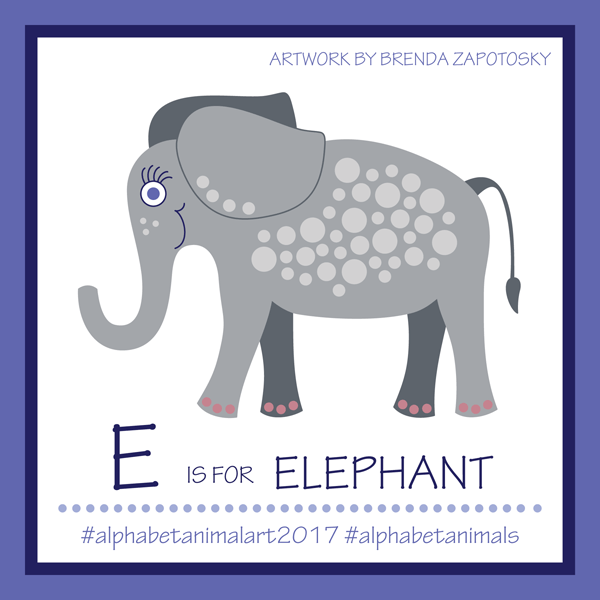
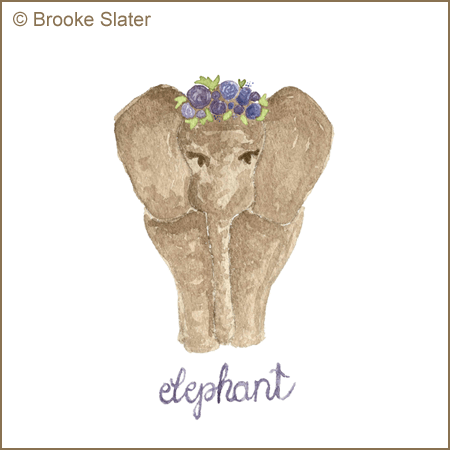
Last but not least is Brooke from the busybdesignstudio. Brooke is one of my “real world” friends and we met through the world of architecture (Me, buildings, Brooke, landscape). I have loved seeing Brooke’s animals for this challenge and discovering a whole other artistic style she has! My favorite of her posts so far is this lovely elephant she has named Esme. The flower crown she gave her is the perfect delicate touch of feminine.
You might notice I have not included any outside artist’s work for the letter F. Sadly, enthusiasm for the challenge has dwindled as the weeks have progressed and there was not a really another F candidate from an artist not already shown here. (I made the decision to only chose one work by each artist). I really hope that after this post there will be a renewed enthusiasm for the challenge because as I said earlier I have really loved seeing what others have created! And if you are new to the challenge (or perhaps got a little lasped in your posts) feel free to jump right in at any letter! We are currently on the letter G!
I hope you have enjoyed this recap and all the animal creations both here and on instagram! Excited what comes in the next batch of letters!
I wanted to start with a short and sweet post to welcome you here to my new blog! I am excited to begin with a clean slate and have great plans for what will be, hopefully, more regular posts. Whether you are a brand new reader or you have been following me on my former blog, (www.bdoodlez.blogspot.com) I am happy you have found your way here! I plan on continuing to post about my designs, collections and a variety of artist stuff. I also plan to begin blogging about my adventures in sewing as well! Designing fabric has inspired me to start sewing more regularly (several times a week in fact) and I am loving getting back into that endeavor and improve my skills. Diving into apparel design has been a big part of that and I am quickly finding that I really love making my own clothes!
I hope you enjoy it all and look forward to hearing your thoughts on all I create!